Blockchain Voting System
Using solidity and the ganache local blockchain, I created a blockchain voting system.
Using solidity and the ganache local blockchain, I created a blockchain voting system.

For years now I have had a keen interest in blockchain technology applications, often referenced as 'Dapps' (decentralised applications), which is why I was adamant in pursuing a project that involved learning about this growing technology. I recently wrote a dissertation on blockchain technology, in which I discussed the immutability of the blockchain, and how it can help poorer countries eradicate corruption via blockchain voting systems, thus promoting equality and upholding UN sustainability goals.
I have a particular ambition to become a blockchain developer which inspired me to pursue this project. I have had previous experience programming with solidity, such as creating a blockchain managed supply chain, therefore using solidity was familiar. Within three weeks of semester 2, I had decided I wanted to pursue this project. The incredible challenge of this project was trying to configure the JavaScript front-end and initialise the metamask browser extension to communicate with my smart contracts. Unfortunately, after many weeks of research and development work I reached a brick wall, and thus was forced to scale back my ambition with this project to meet with the timeframe given. However, the journey of development enabled me to flex my programming knowledge and gather a great deal of knowledge on JavaScript, node.js, JSON, and the truffle development suite, therefore enabling me to categorise this project for me as a great success as it pulls me one step closer to my ambition.
The aim of this project was to create a voting system operated on blockchain technology. The system should have the ability to cast votes (using test addresses from ganache), to designate candidates, to designate proposals for the voting, and to open and close the voting ballot on request.
In this project the following resources enbaled me to contruct the blockchain voting system:
To begin, I needed to research the exact application requirements to contruct the system, for example needing the web3 JavaScript API, truffle suite, and smart contracts. I found a useful website from popular online porgamming experts freecode camp. Freecodecamp enabled me to develop on my knowledge on the rules and logic of the Ethereum blockchain, as well as what would be required to create this application. My knowledge of blockchain technology enabled me to discover the possibilities of truffle pet-shop, a template start code for creating decentralised applications.
https://www.freecodecamp.org/news/developing-an-ethereum-decentralized-voting-application-a99de24992d9/
https://boostlog.io/_junp1234/how-to-make-a-dapp-of-a-pet-shop-using-solidity-and-truffle-5ab200c50814730093a2ec91/
I came across a website that displayed clearly, using a diagram, the different applications and requirements, as well as the purpose of each. This site provided a step-by-step process on how to create my system.
https://blog.logrocket.com/interacting-smart-contracts-via-nodejs-api/
Furthermore, I exercised my knowledge using the tutorial in the link below:
https://www.moesif.com/blog/blockchain/ethereum/Tutorial-for-building-Ethereum-Dapp-with-Integrated-Error-Monitoring/
To be able to create this, we must ensure we can operate on a network. Using the most popular Ethereum truffle development framework, we will connect to the Ethereum testing local blockchain ganache to enable for testing of the application. To determine what would make a decentralised voting system unique, I viewed various opinions online on StackOverflow which specified a number of requirements to make the program worthwhile and functional. These requirements were the ability to prevent the selling of votes, prevent the stealing of votes, promote safer voting, and how an absentee may vote.
https://politics.stackexchange.com/questions/25618/decentralized-electoral-system
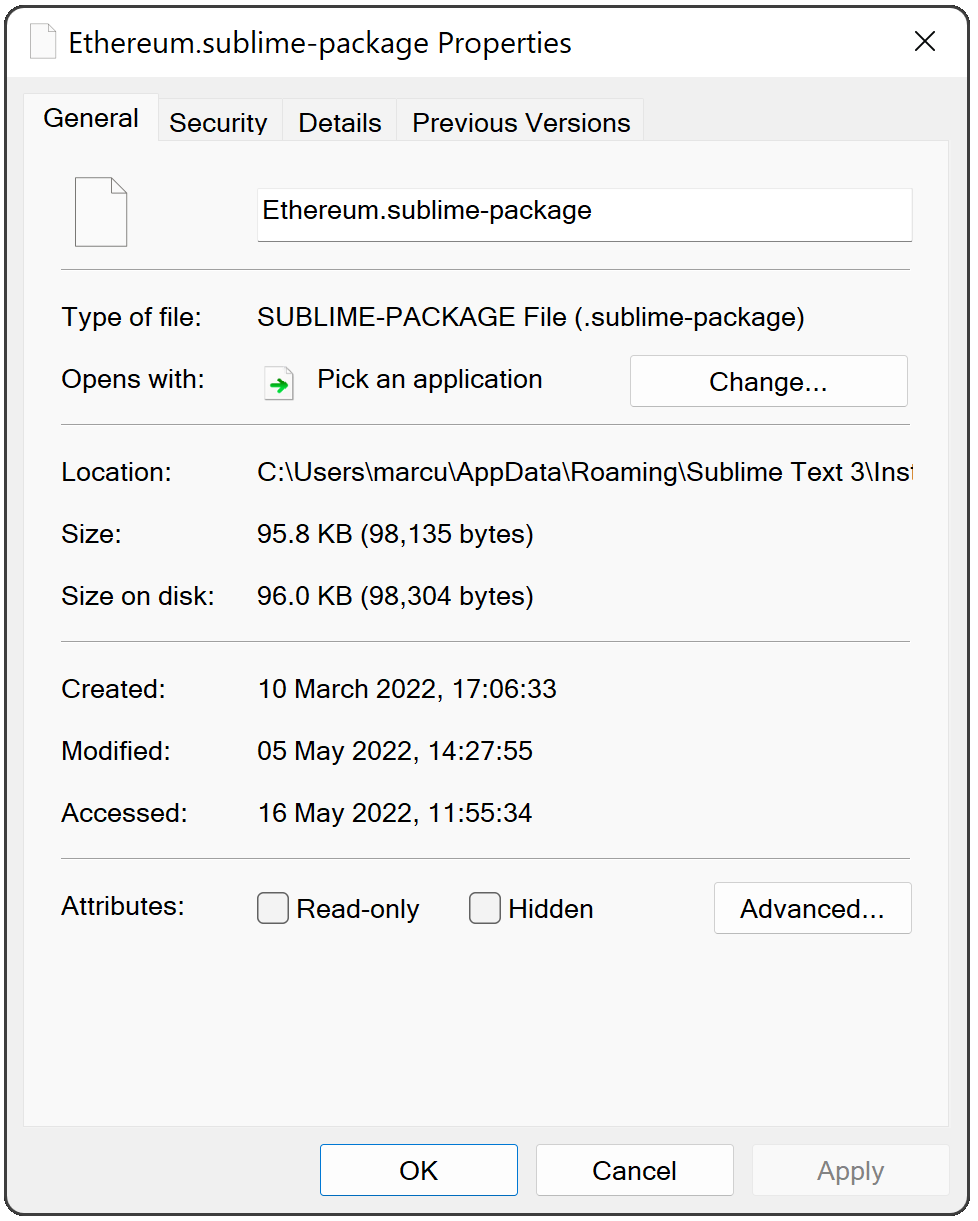
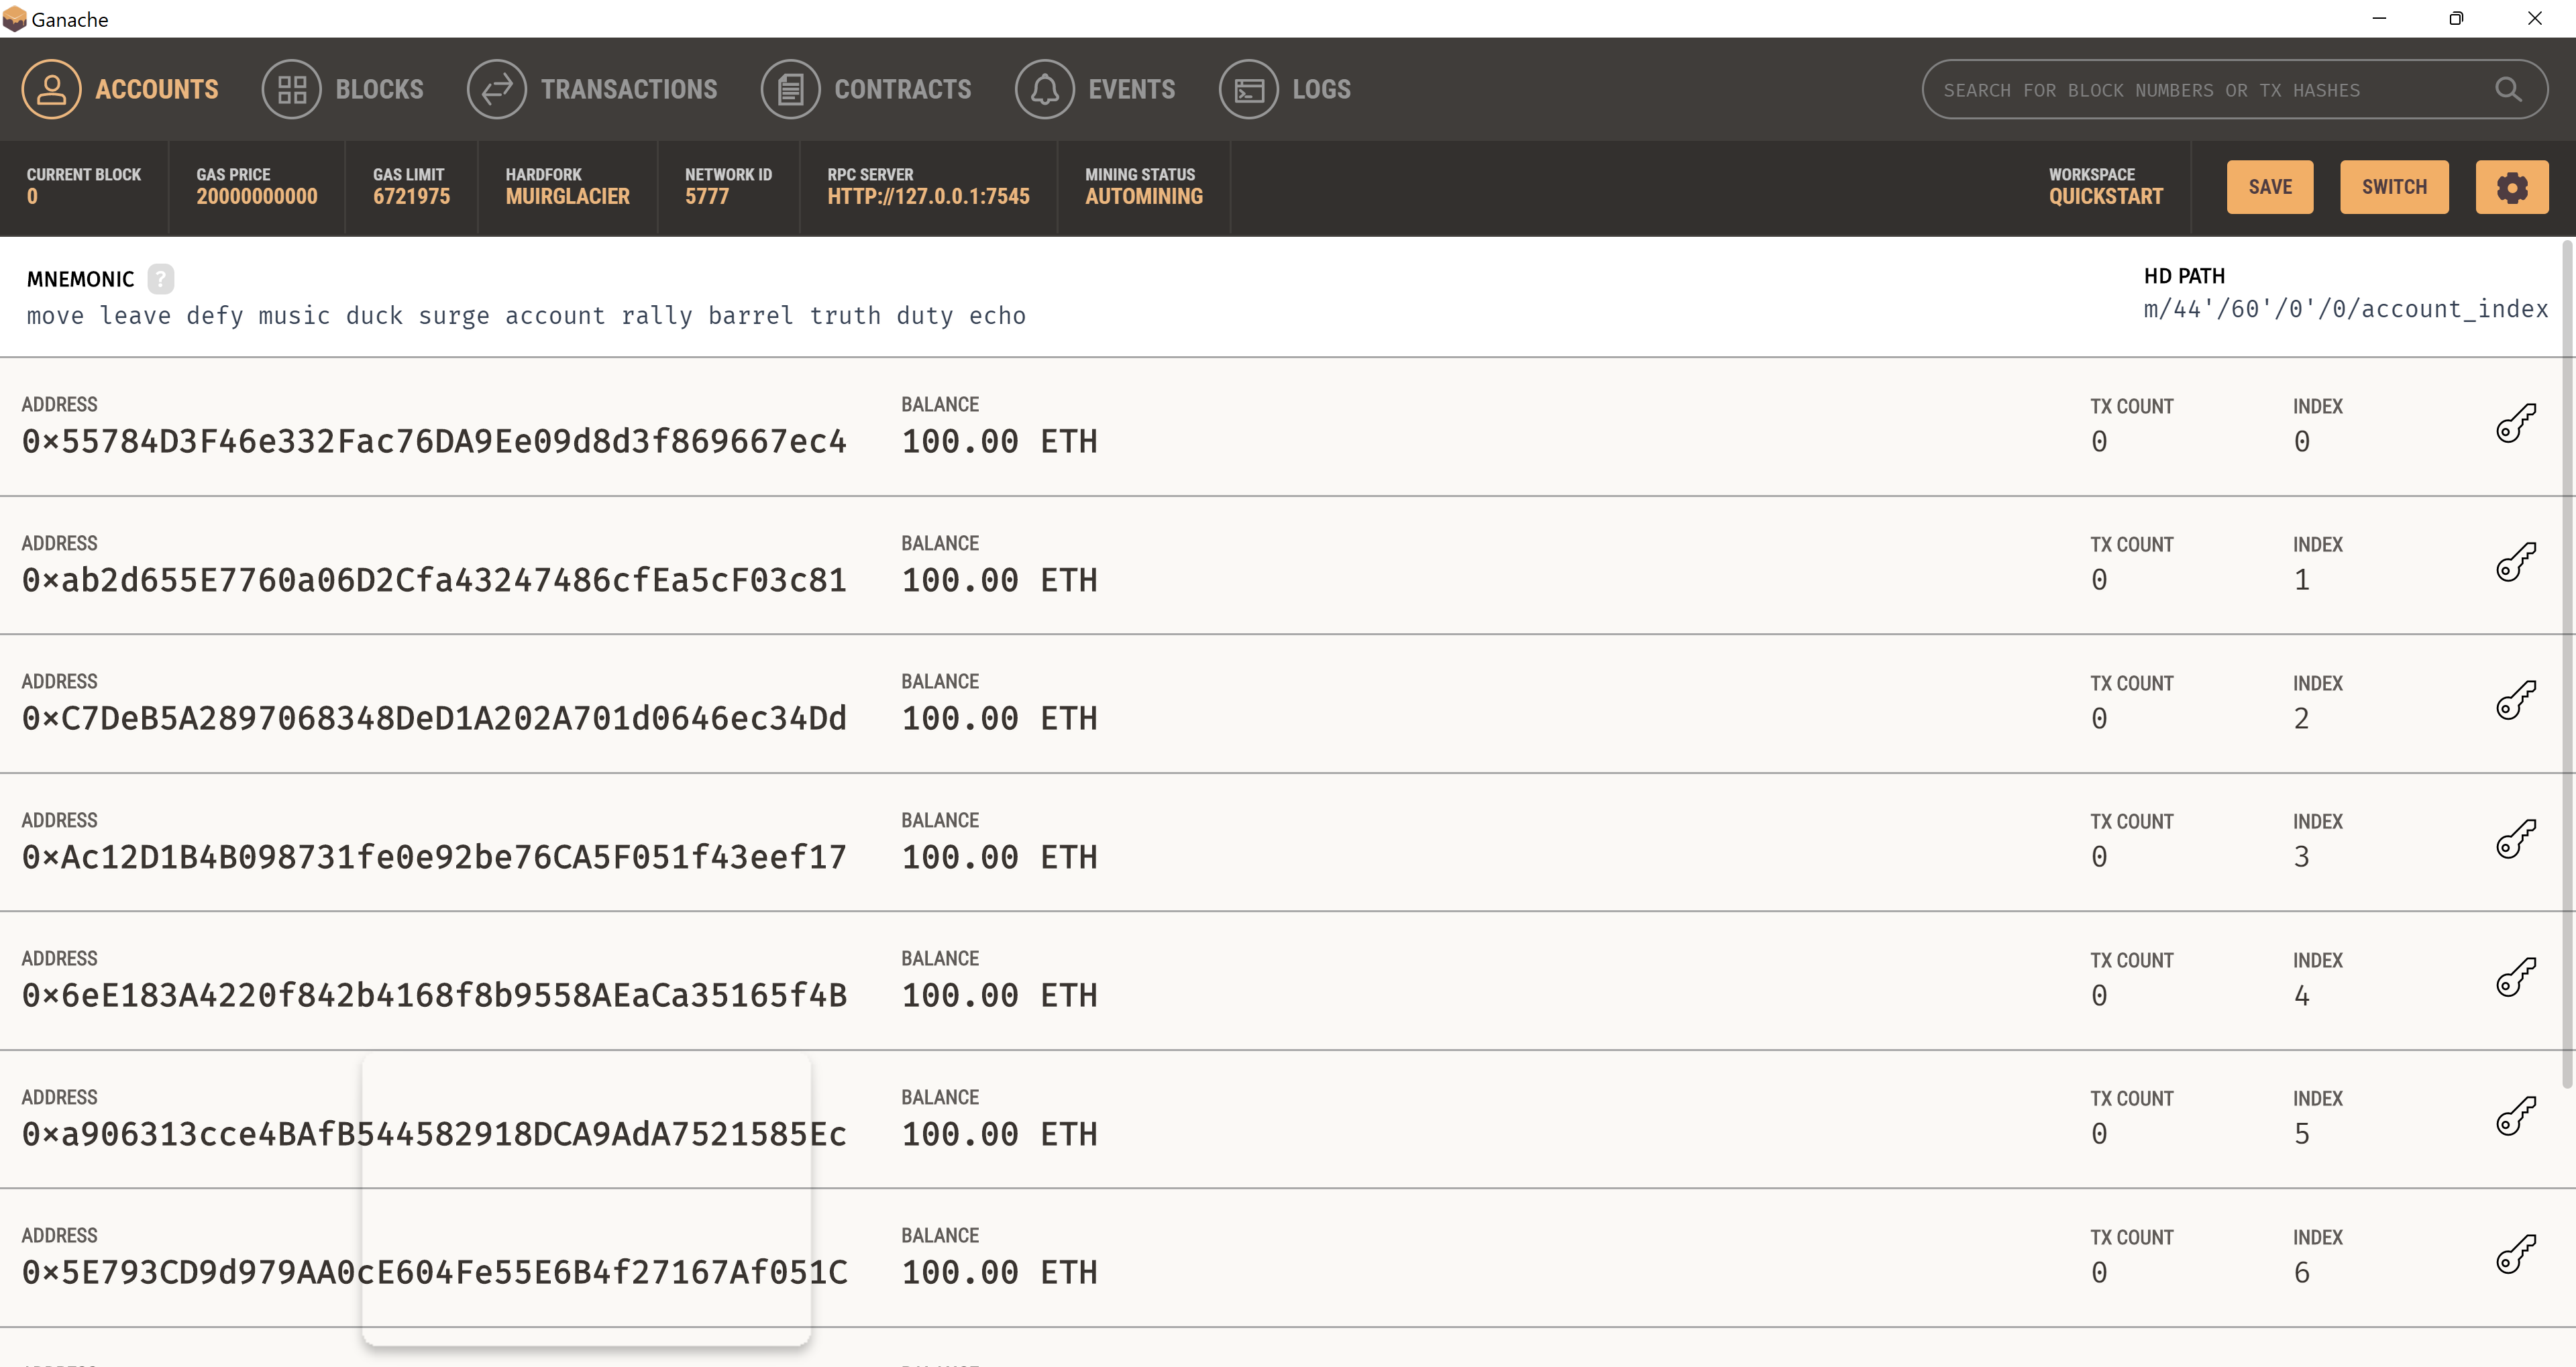
To begin, I installed the ethereum package into sublime text, to enable blockchain capabilities within the text editor. Then I set up my local blockchain through ganache. Each account provided by ganache contains 100 Ethereum. The addresses represent a singular voter in an election.
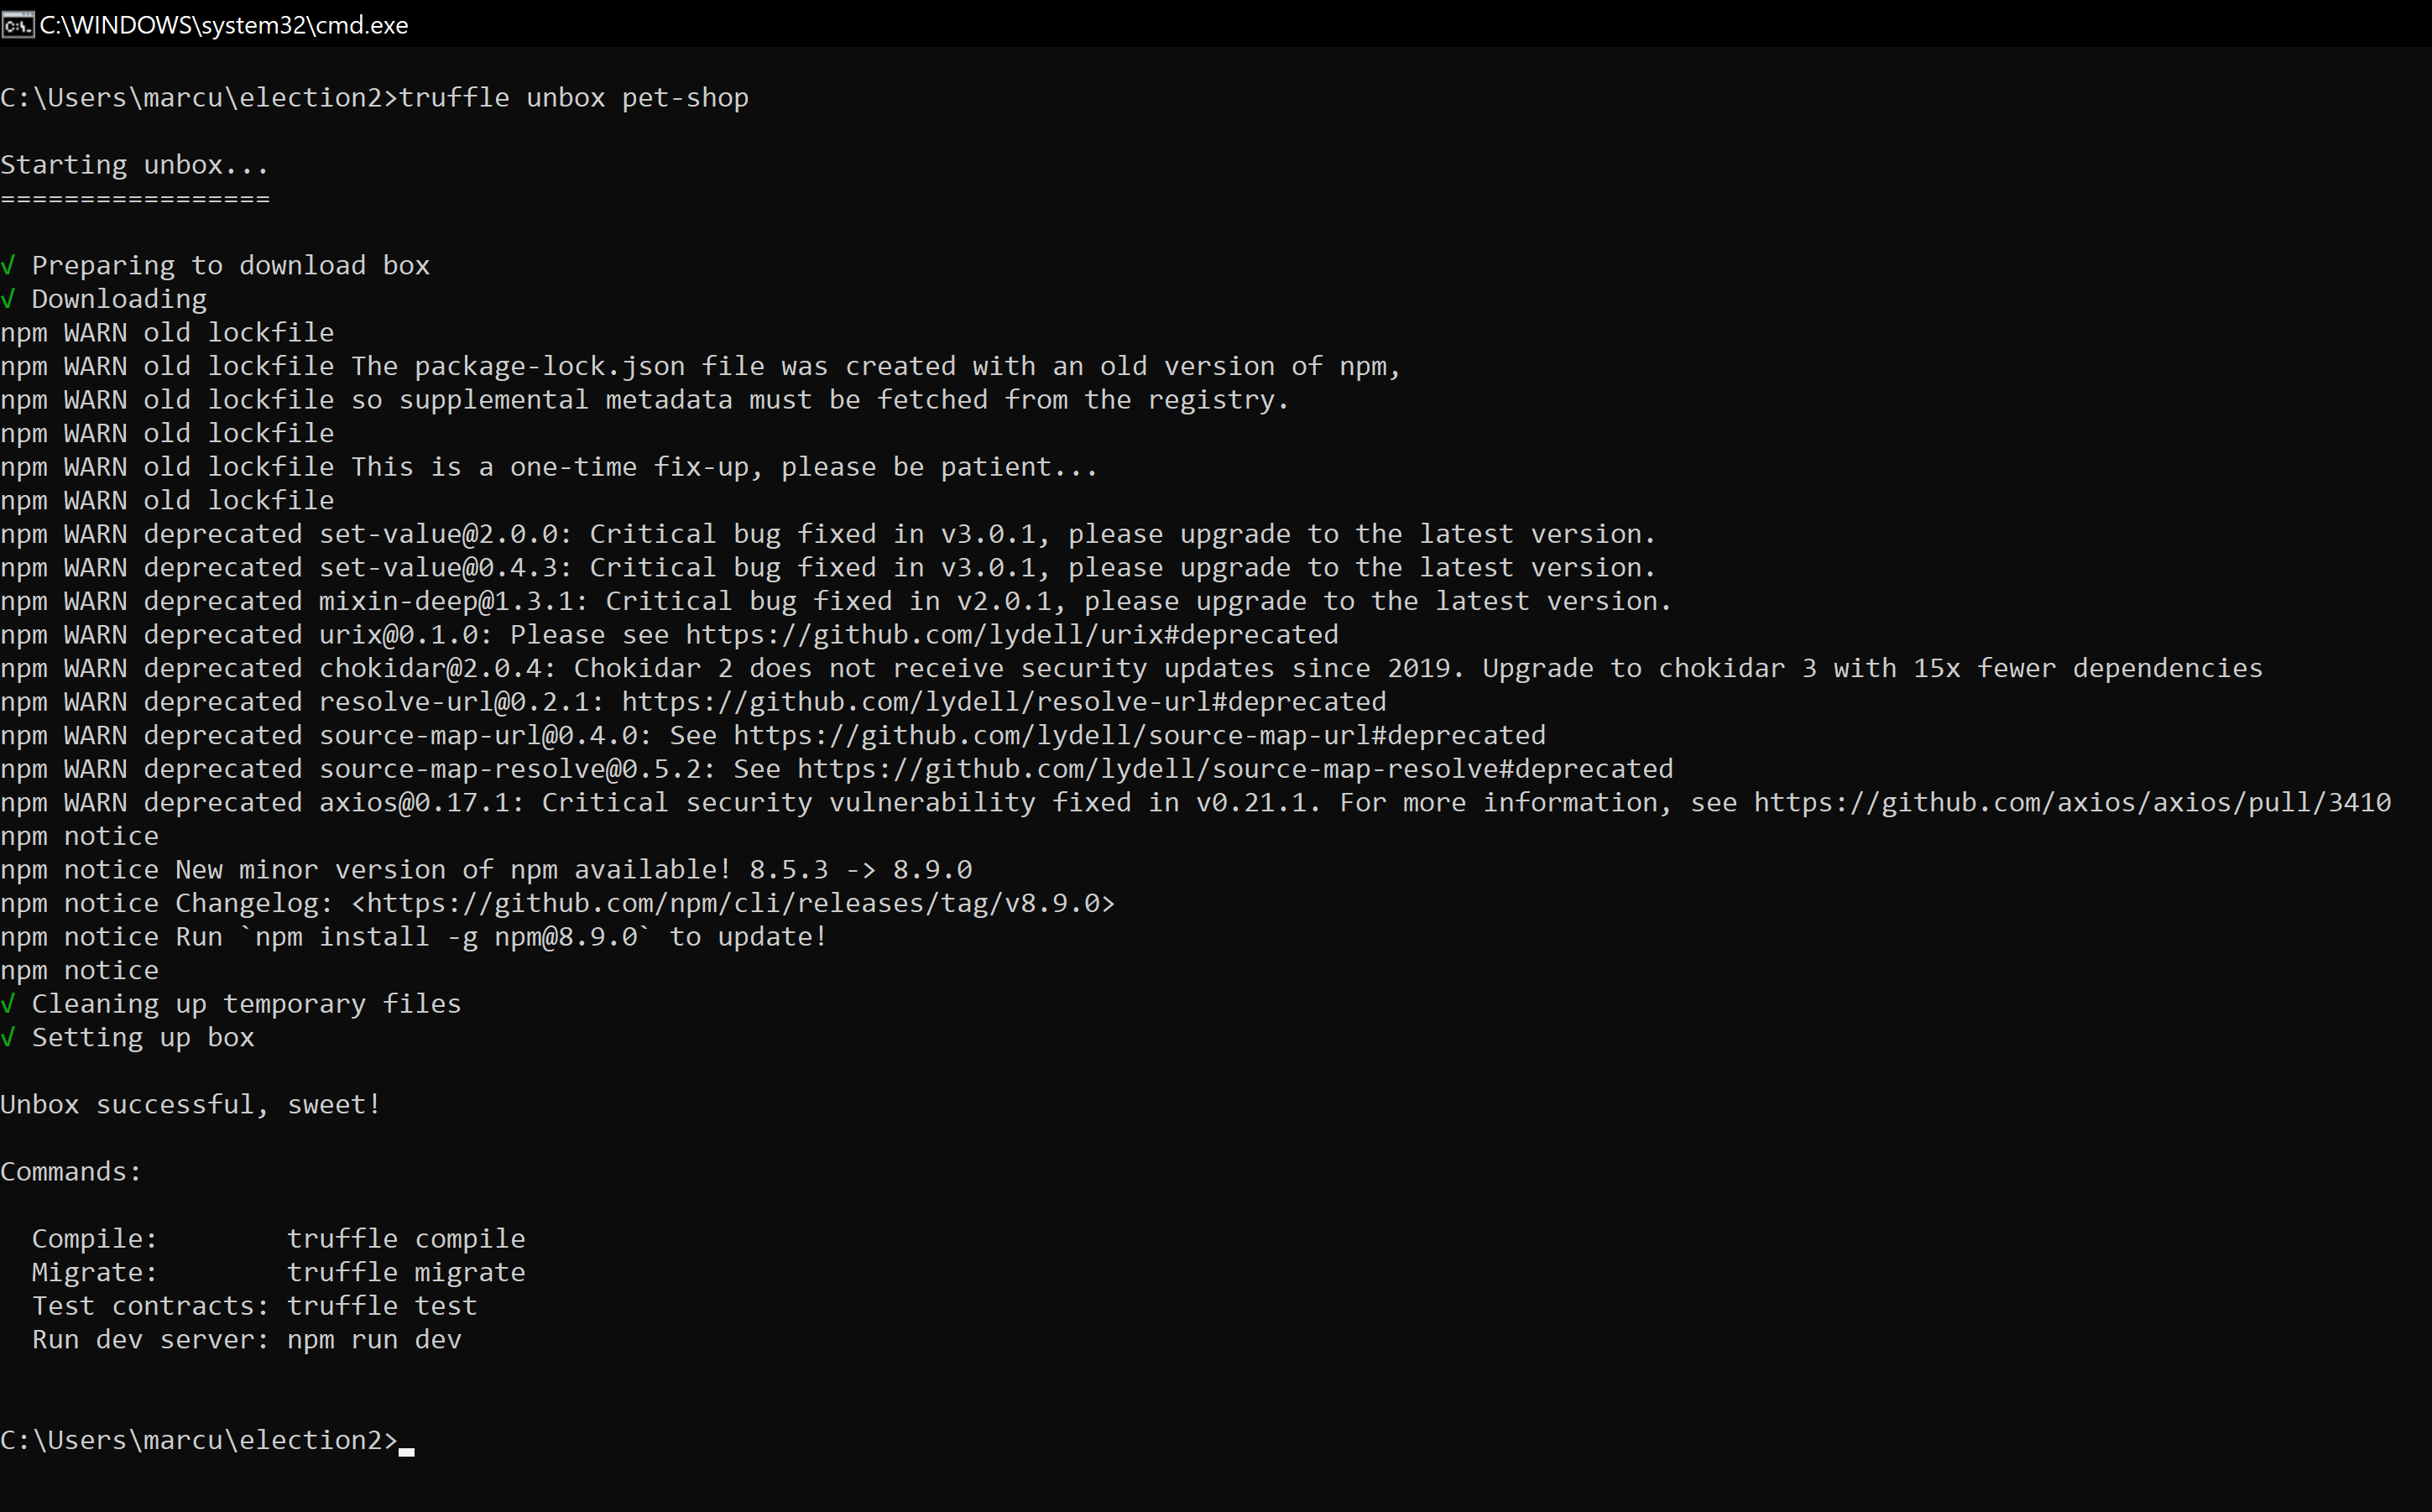
I used the truffle pet-shop package that comes with truffle to generate a folder full of template code for a decentralised application. To unlock the contents, I opened the directory I wanted the contents within within the command prompt, followed by 'truffle unbox pet-shop'. The pet-shop box comes with a pre made ‘migrations.sol’ file. This file is important as it enables us to push the smart contracts/run the code on the Ethereum blockchain through the 'migrate' command.
Additionally, the pet-shop box includes an ‘src’ folder. This folder contains pre-created client-side configurations, such as a HTML and CSS file to get started. At this point, the configuration structure has now been created.
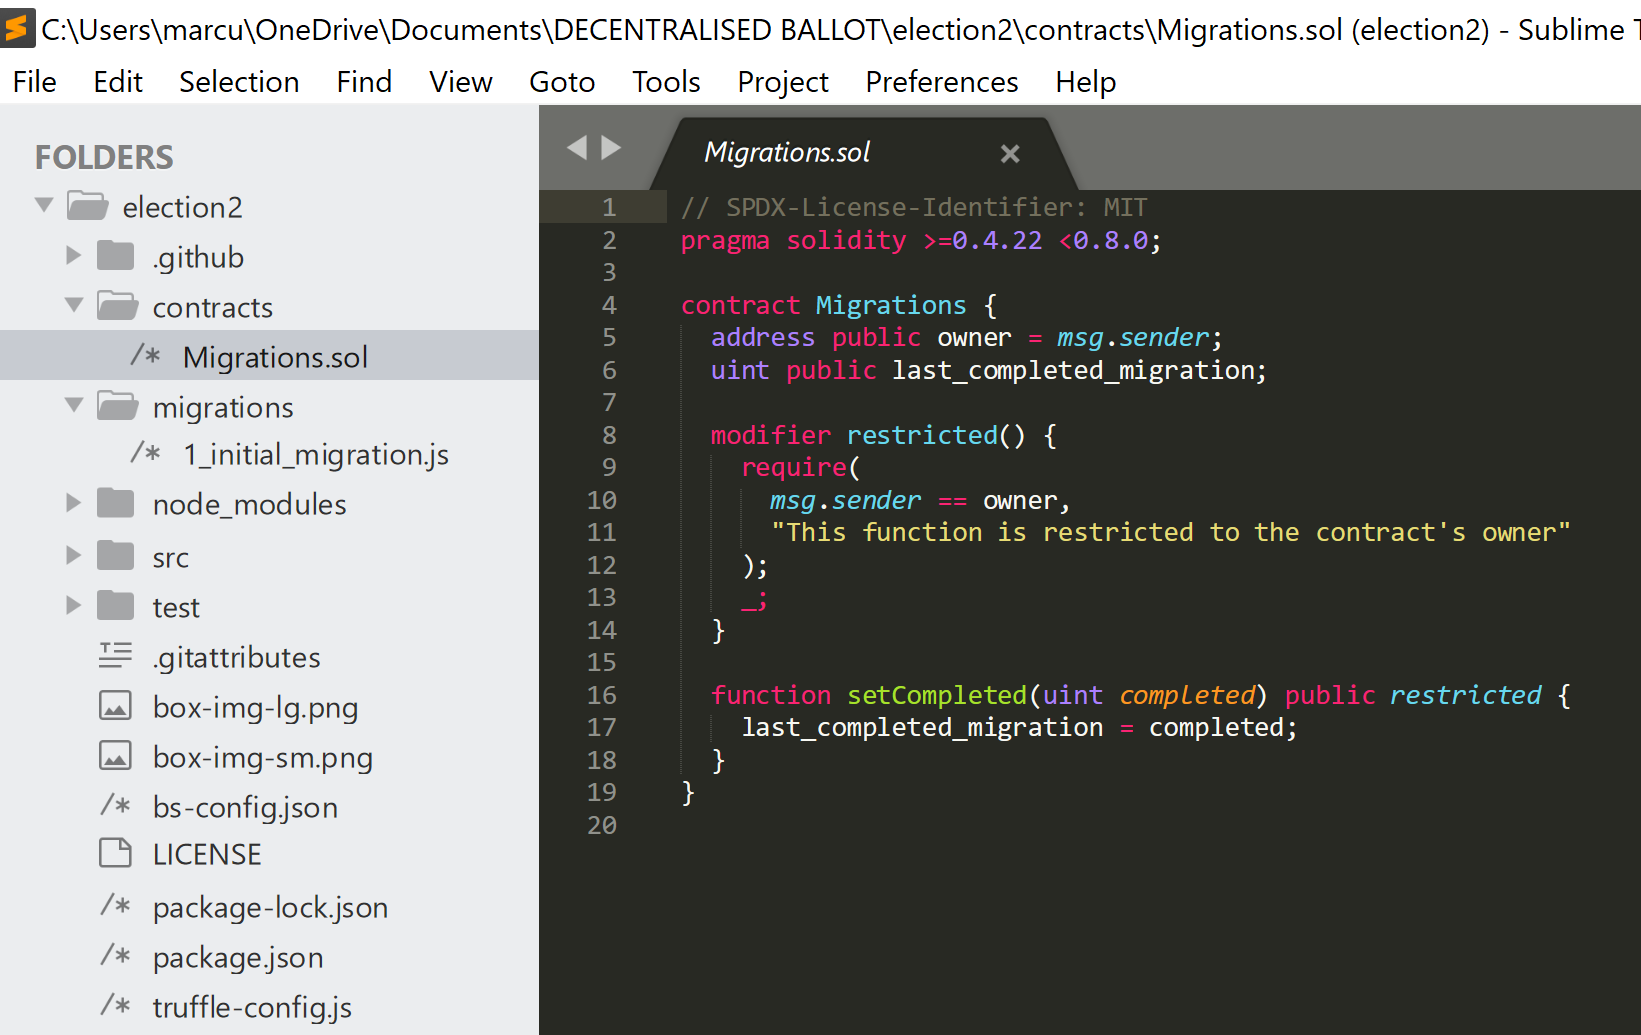
Smart contract applications are programmed using solidity. Within solidity it is essential that the version is always specified at the beginning, to enable compatibilities and the use of certain functions and packages. To begin I made a smart contract which is a predetermined set of rules and code that executes when certain conditions are met.
The election ‘Election.sol’ comes with the pet-shop package. This code provided by the pet-shop package is in fact outdated and the functions and logic had changed quite drastically, which is to be expected with blockchain tehcnology. It was important to input a constructor function, which is used to validate and initialise code upon execution.
https://cryptomarketpool.com/constructor-in-solidity-smart-contracts/
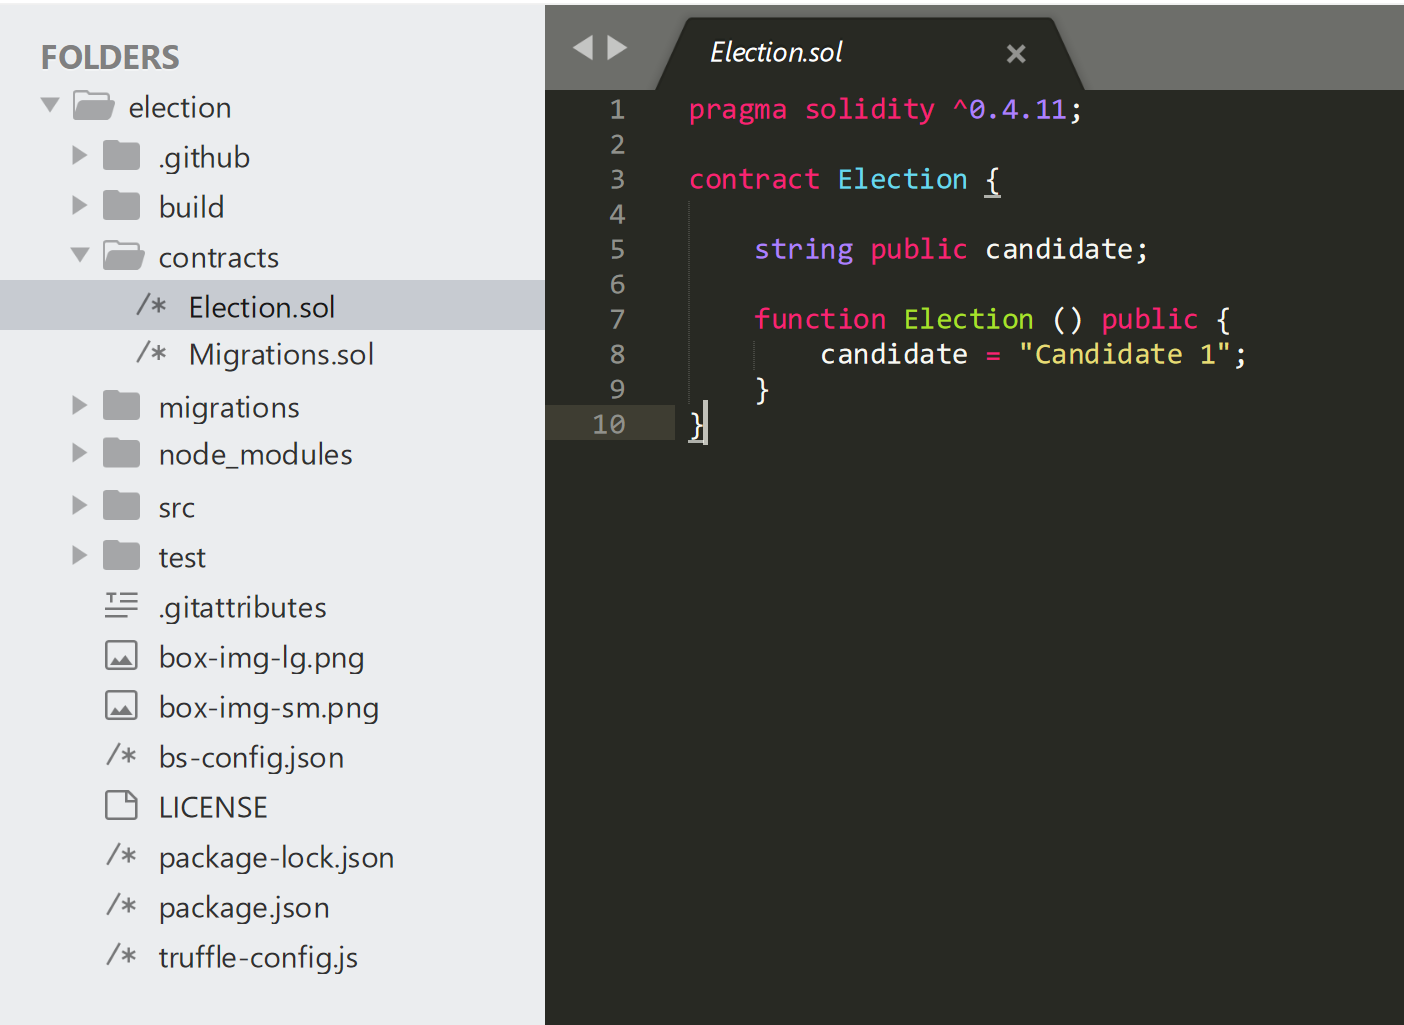
I inserted a constructor function as the solidity rules and unctions have changed considerably over the years, and the pet-shop package is quite old. Therefore instead of 'funtion election' it has changed to 'constructor ()'. Furthermore, to be able to run the constructor function, it must be made public, as the purpose of this constructoris to display the information. If the constructor is not functioning then it is likely because it has not been specified whether it is permissioned to initialise the code, which is the purpose of regarding it as ‘public’ or ‘internal’.
https://ethereum.stackexchange.com/questions/30223/should-the-constructor-function-be-public
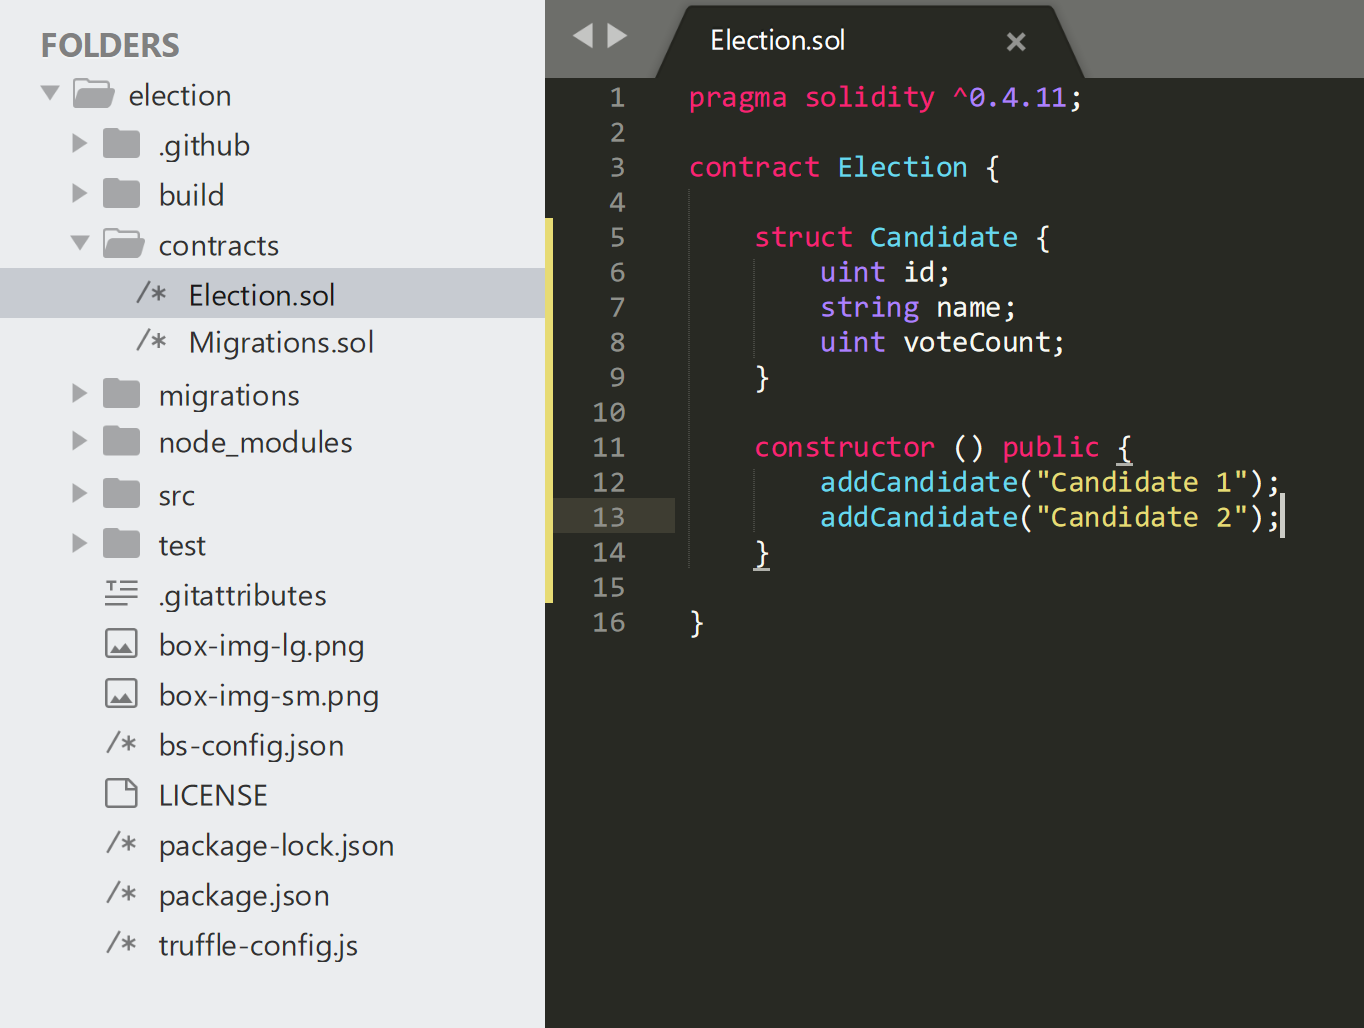
The ability to interact with the contracts through the client side and testing side is through node.js. Using the pet-shop pre-installed node.js compatible file called ‘1_initial_migration.js’, we can enable interaction. The purpose of the initial migrations is to push/deploy a contracts’ data to the blockchain through the back-end server, it helps compile and pack together the smart contracts to be safely initialised on the Ethereum blockchain it is being deployed to. The following link explains migrations and their importance in more detail. It is essentially the delivery mechanism.
https://www.sitepoint.com/truffle-migrations-explained/
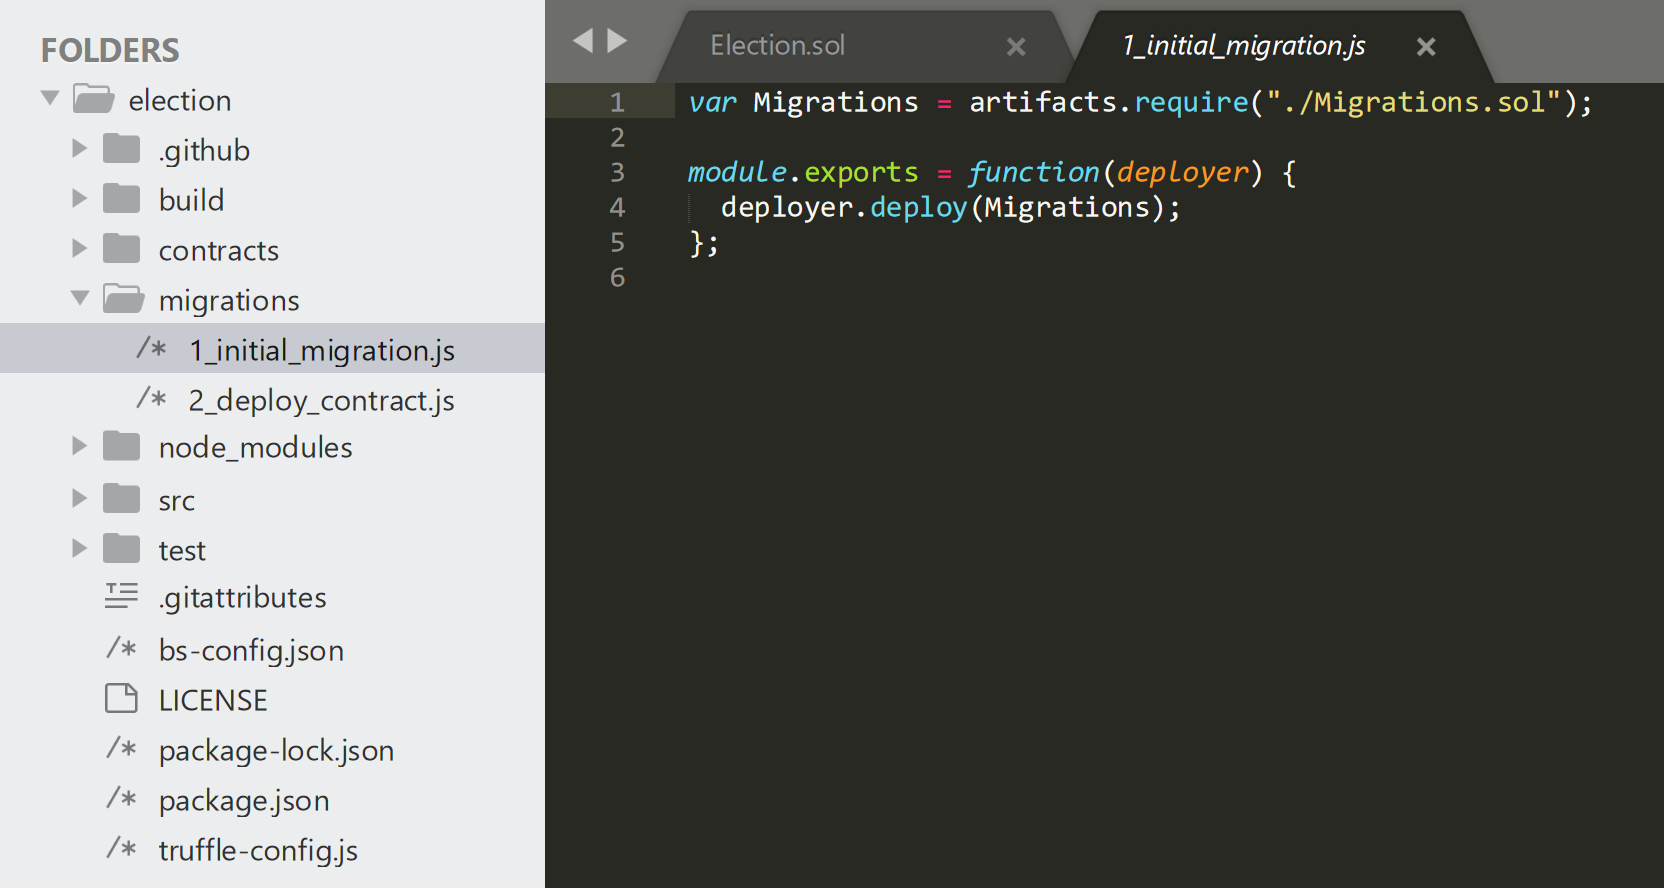
Truffle has a simple method of migration file configuration, in which it runs files in numerical order, therefore it is important to establish a numerical at the beginning of file names.
Since the pet-shop package already configures the method of migration for us, it is now up to me to do the same for any other contracts I wish to deploy. This is made easy as all it takes is to copy and paste the ‘1_initial_migration.js’ code into another file that will act as the delivery mechanism for deploying the Election.sol smart contract. Therefore, the name ‘migration’ must be changed to Election.
The purpose of the code is as follows:
the designation of Election as a variable establishes the variable that is being configured, which is located in the Election.sol file, which is specified at the end of the line.
Artifacts.require is a function special to truffle. Truffle allocates artifacts which enables a contract to be interactive. It wraps up all the code from the specified contract and then deploys it using the migration. Essentially, a smart contract contains the instructions, the migration file is the method of delivery to the blockchain, and the artifact is unpacked with all the data that’s been wrapped up.
https://www.ionos.co.uk/digitalguide/websites/web-development/what-is-a-wrapper/
https://trufflesuite.com/docs/truffle/getting-started/interacting-with-your-contracts/
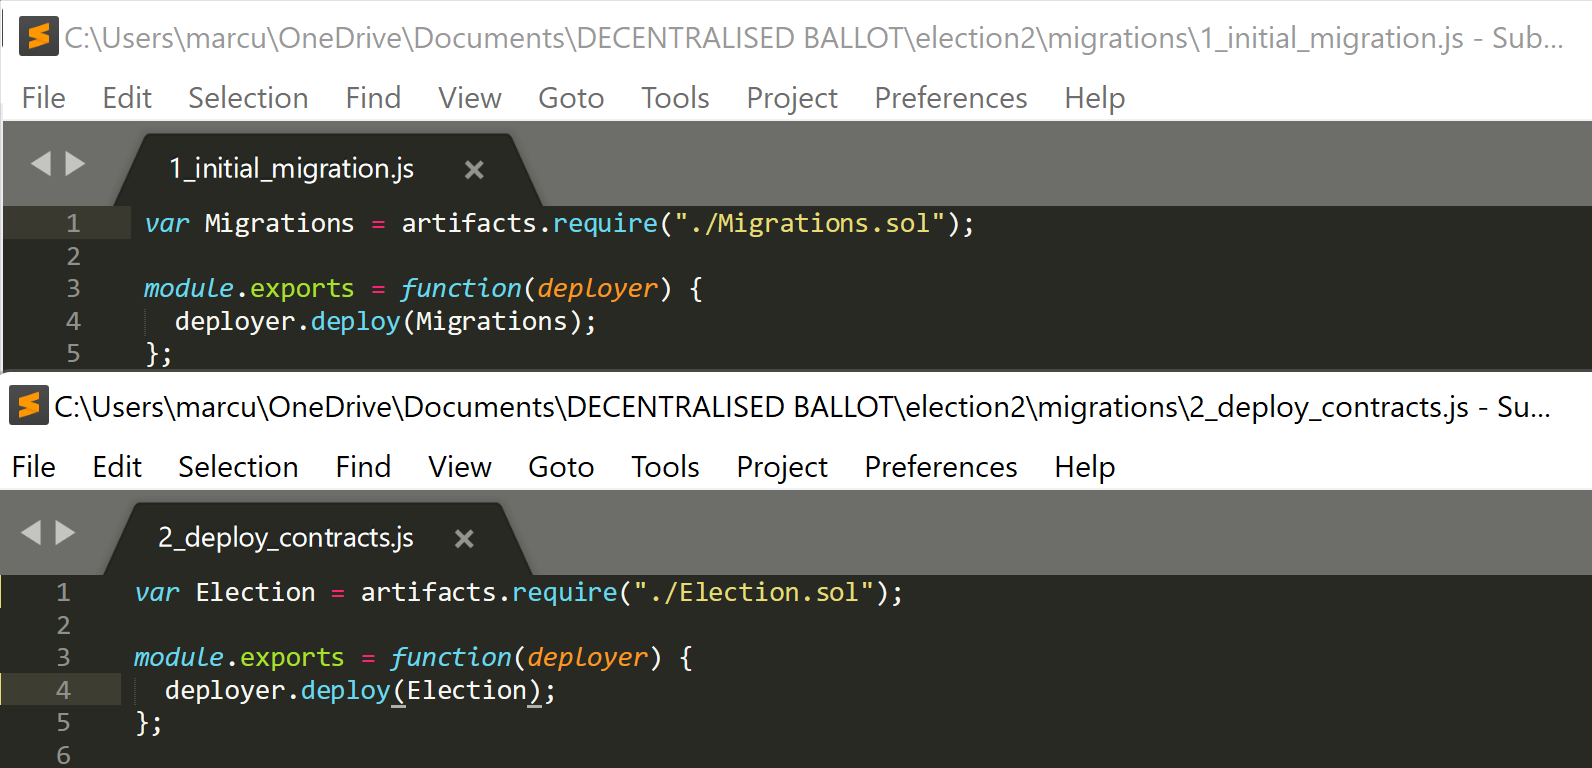
We designate ‘Election’ as an artifact as it makes it an abstraction, to prevent unnecessary information on the client side of the application. The next step is to declare our contract and fetch the data from our development environment (ganache) to be able to run the code with the proper information.
Now that the migration files have been linked with the smart contracts, I could start testing their deployment. I opened ganache, then command prompt, opened the appropriate directory, and then executed 'truffle migrate'.
Deployment successful.
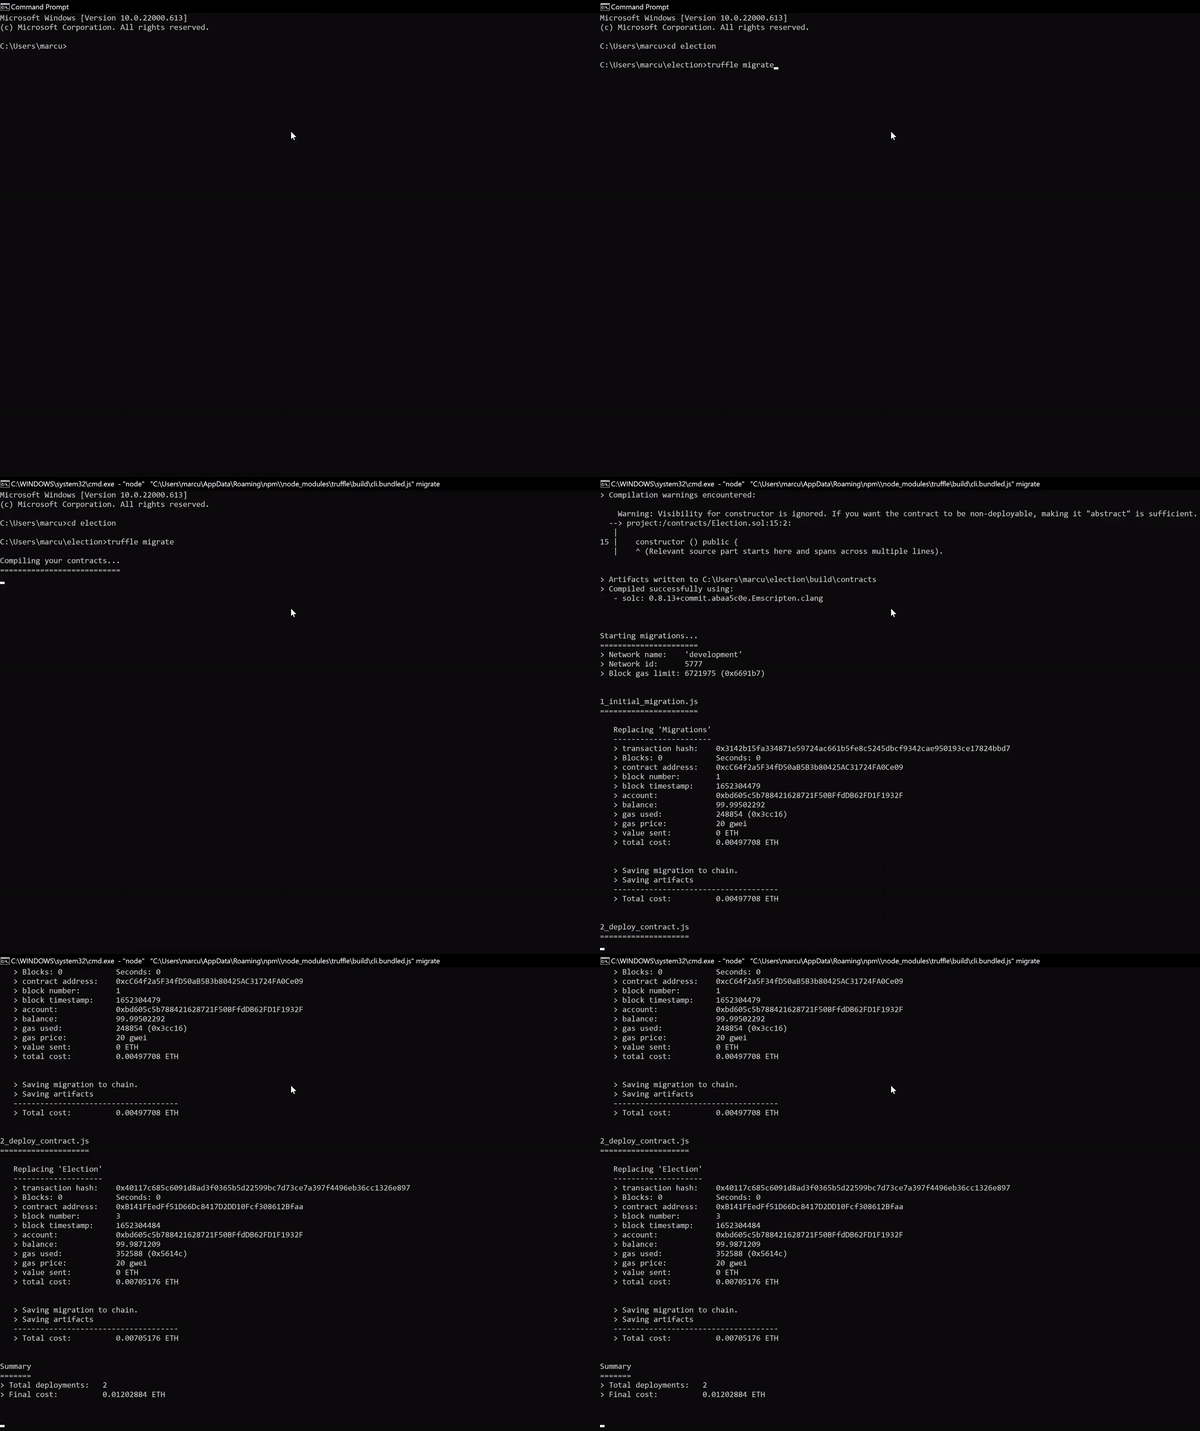
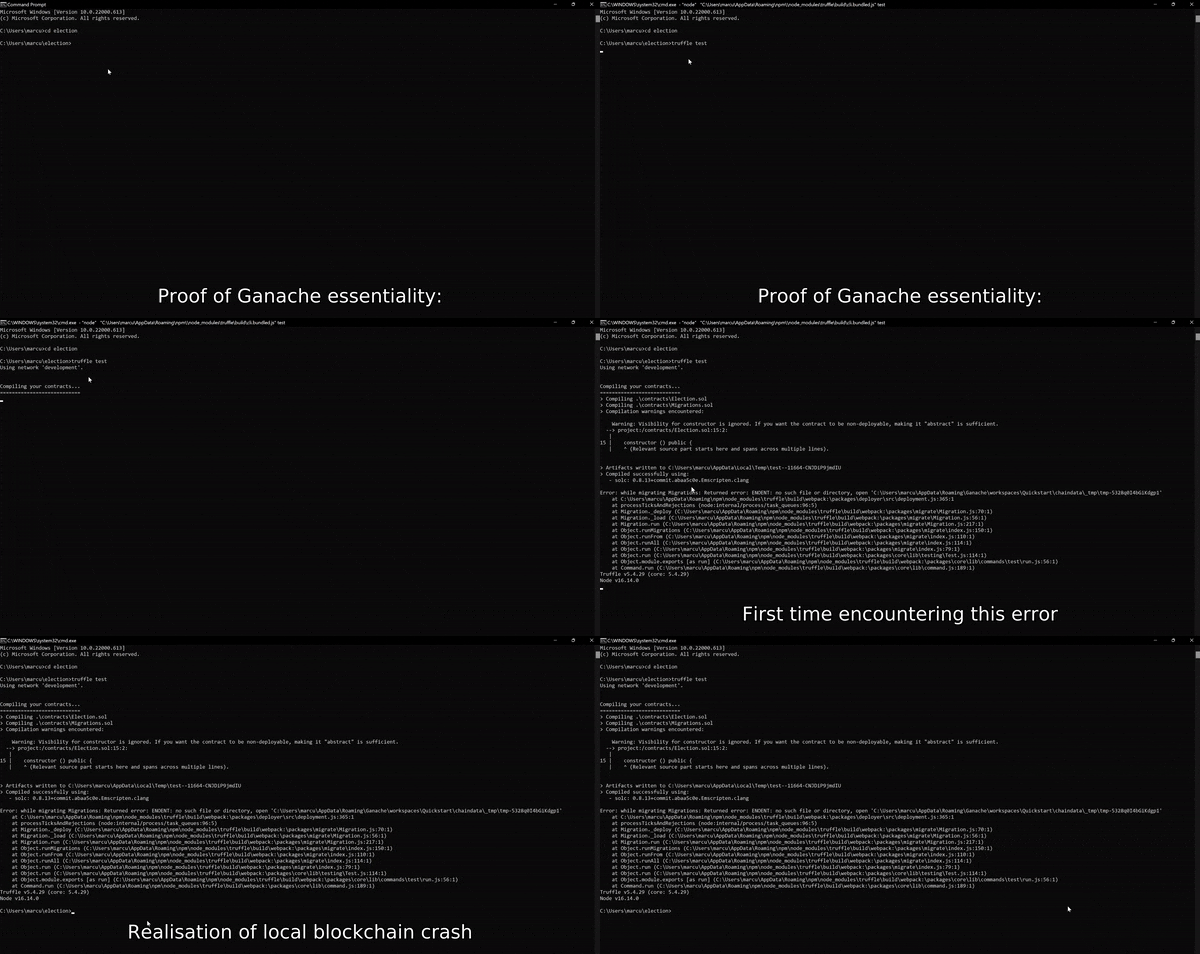
To show the essentiality of ganache, I forgot to boot up the local blockchain and then was shown an error:
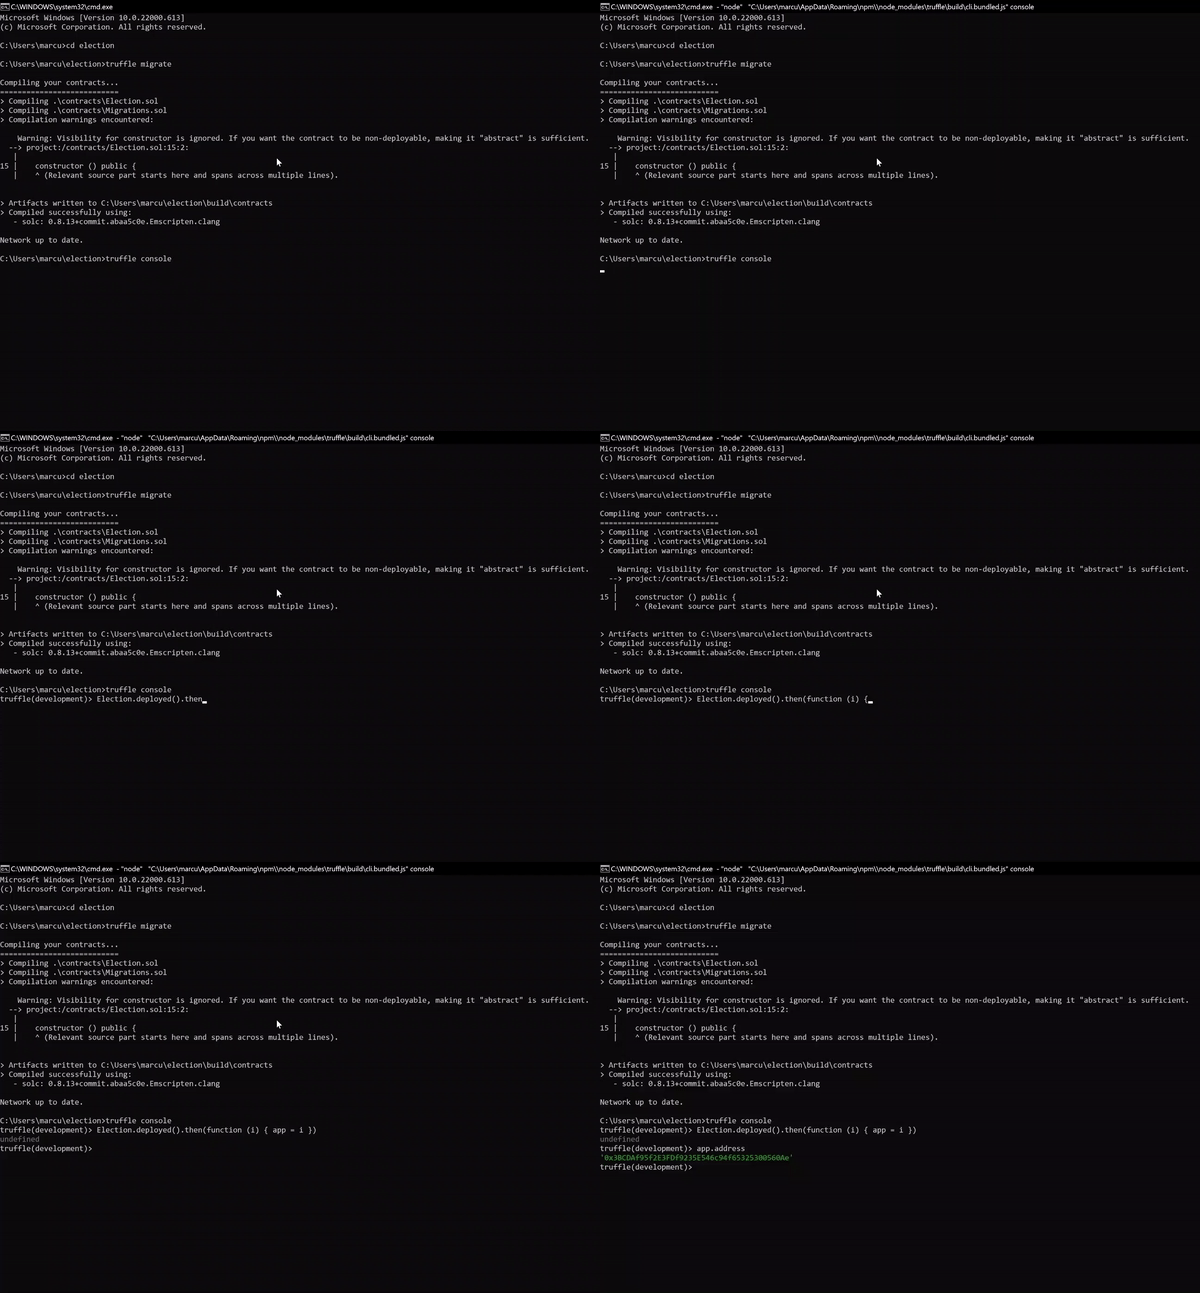
It was decided that testing every aspect of the code individually wasn’t feasible, therefore I decided to wrap the whole source code into a variable called ‘app’. This means I can communciate with the entirety of the file directory, it establishes a bridge so in JS files, HTML, CSS etc. it is made a universal variable with little effort to integrate it. https://ethereum.stackexchange.com/questions/67870/app-candidates-is-not-a-function-getting-these-error-while-caling-the-functio

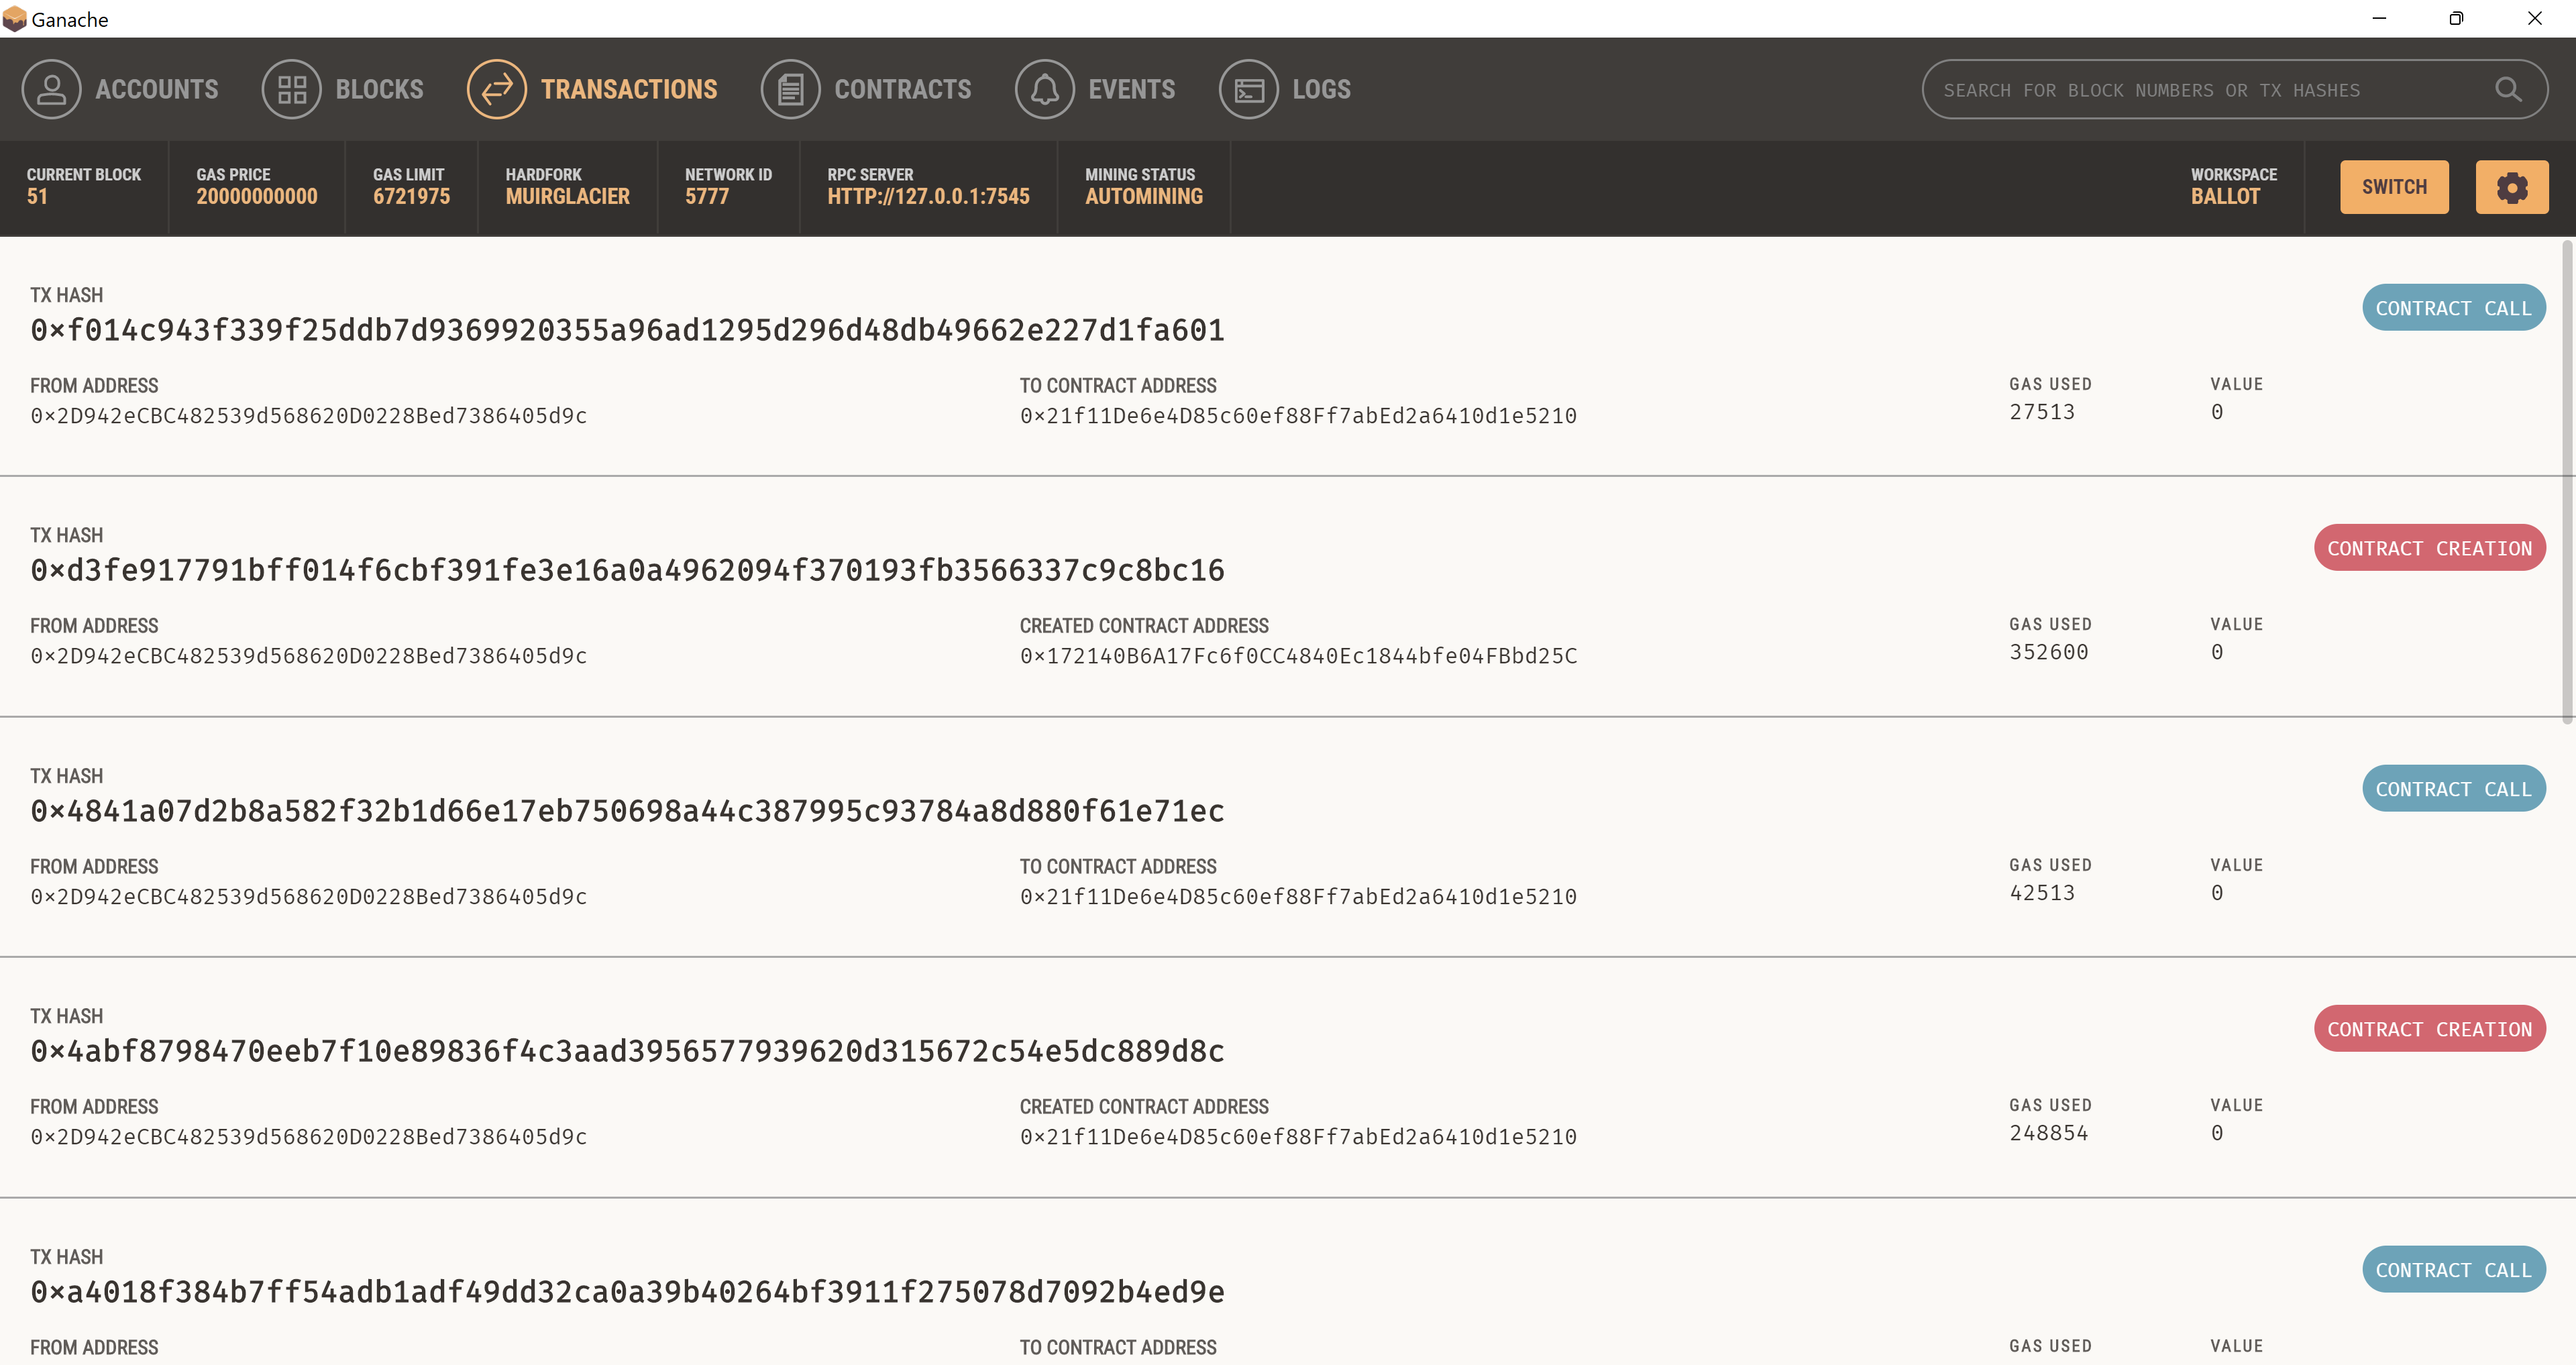
Unusually, the migrations stopped working. The error specified compatibility issues between truffle and the solidity version. After extensive research I found a compatible solidity version, however it still did not work.
https://www.npmjs.com/package/truffle?activeTab=versions
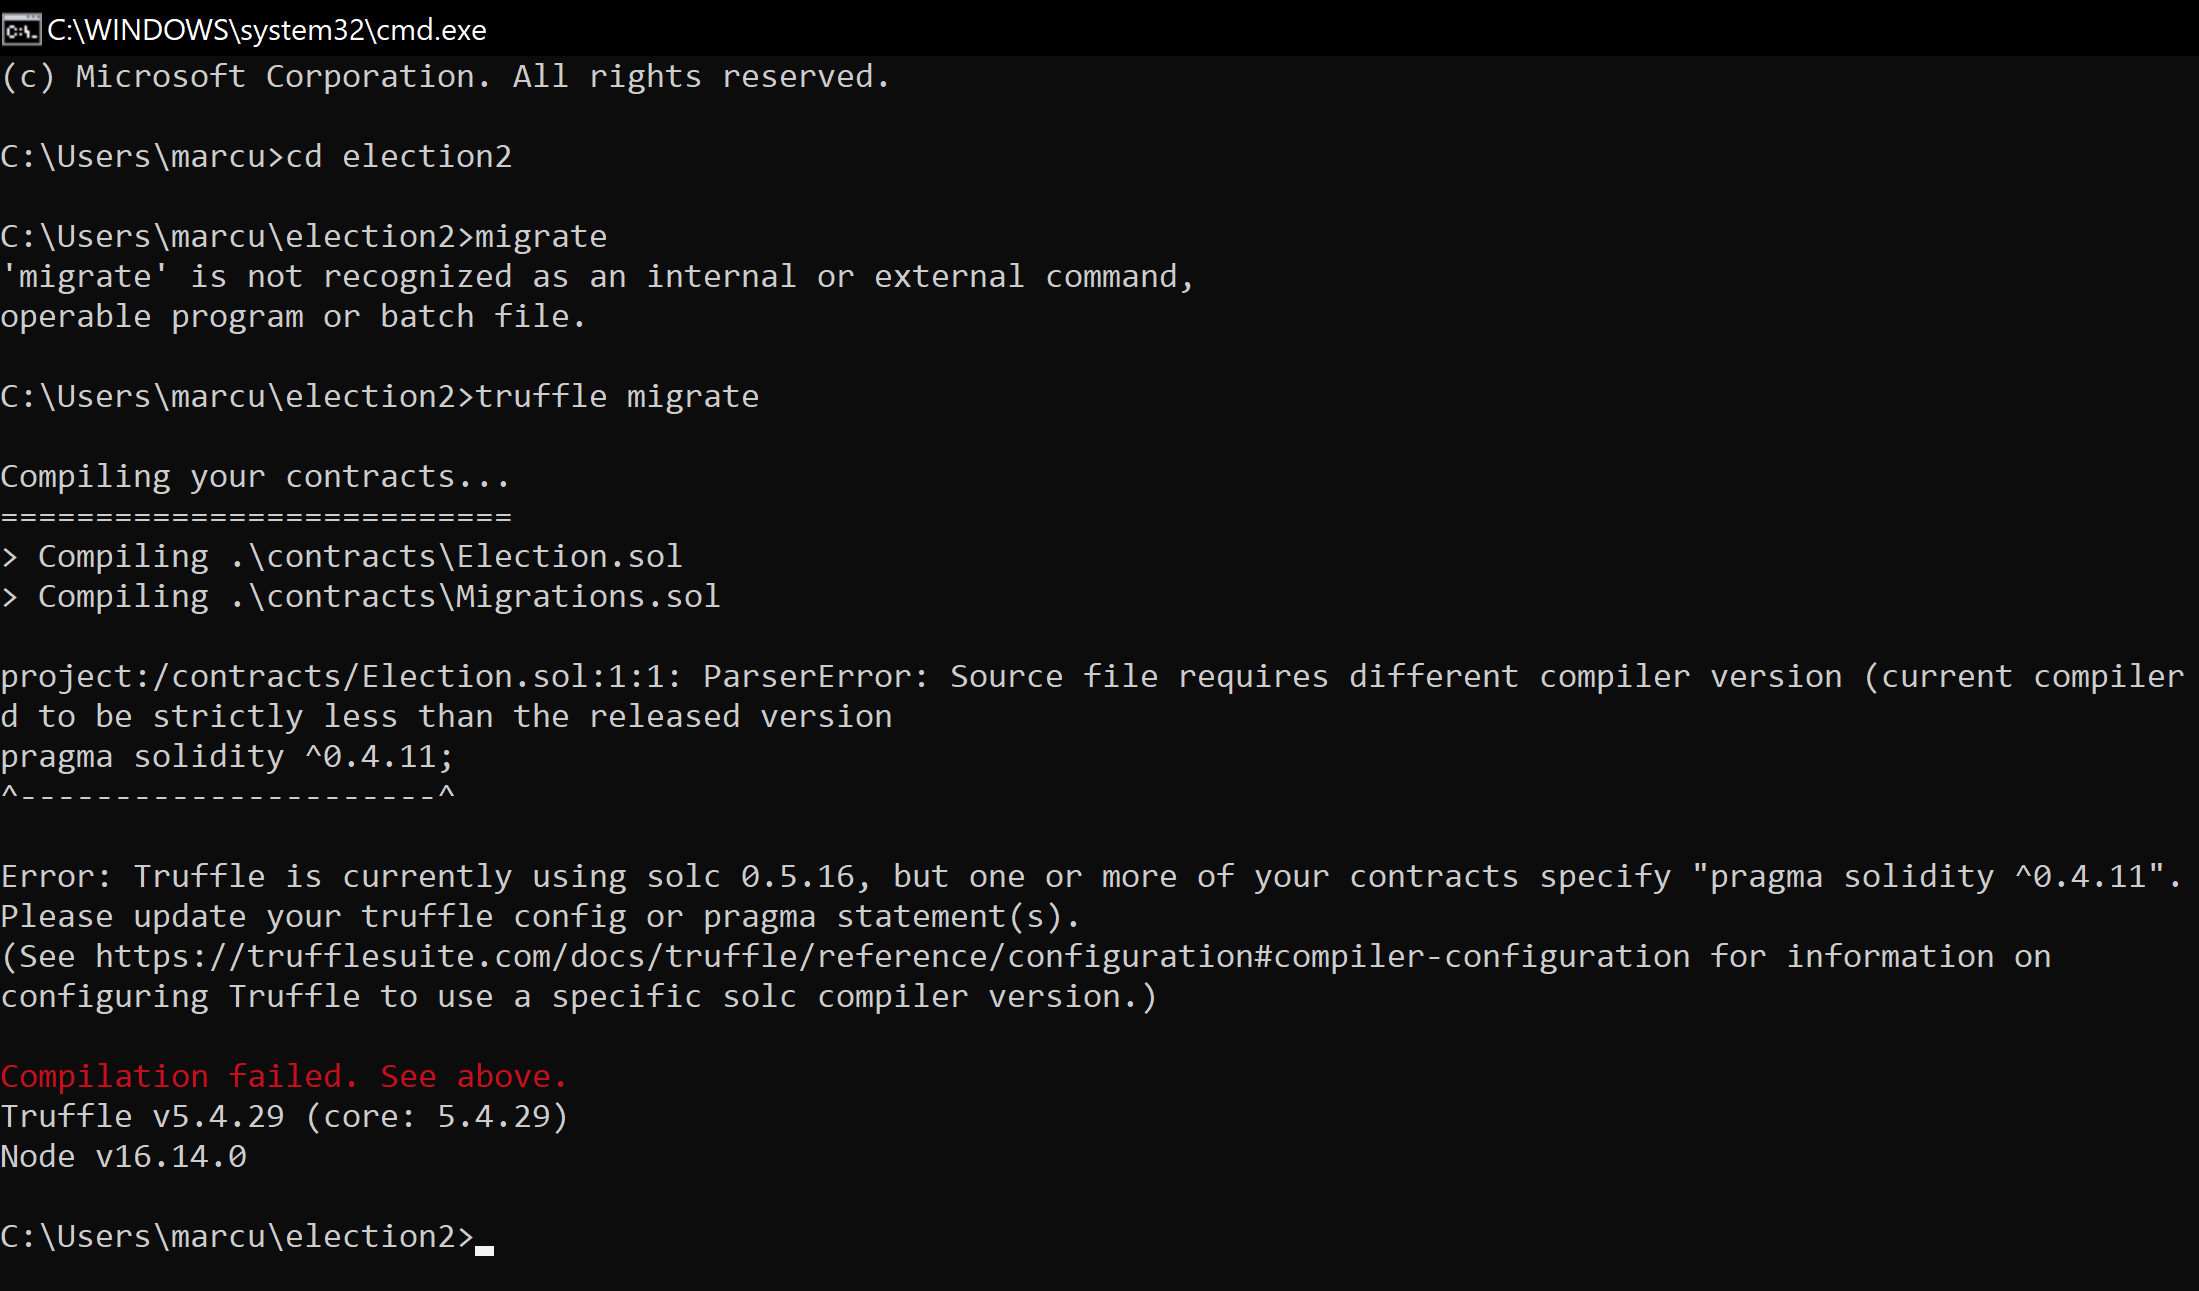
This error shows me trying to change the truffle version, in order to make it compatible with the latest version of solidity. I changed both the solidity and truffle framework versions multiple times through trial and error to eventually come to a compatibility consensus, often resulting in more errors.
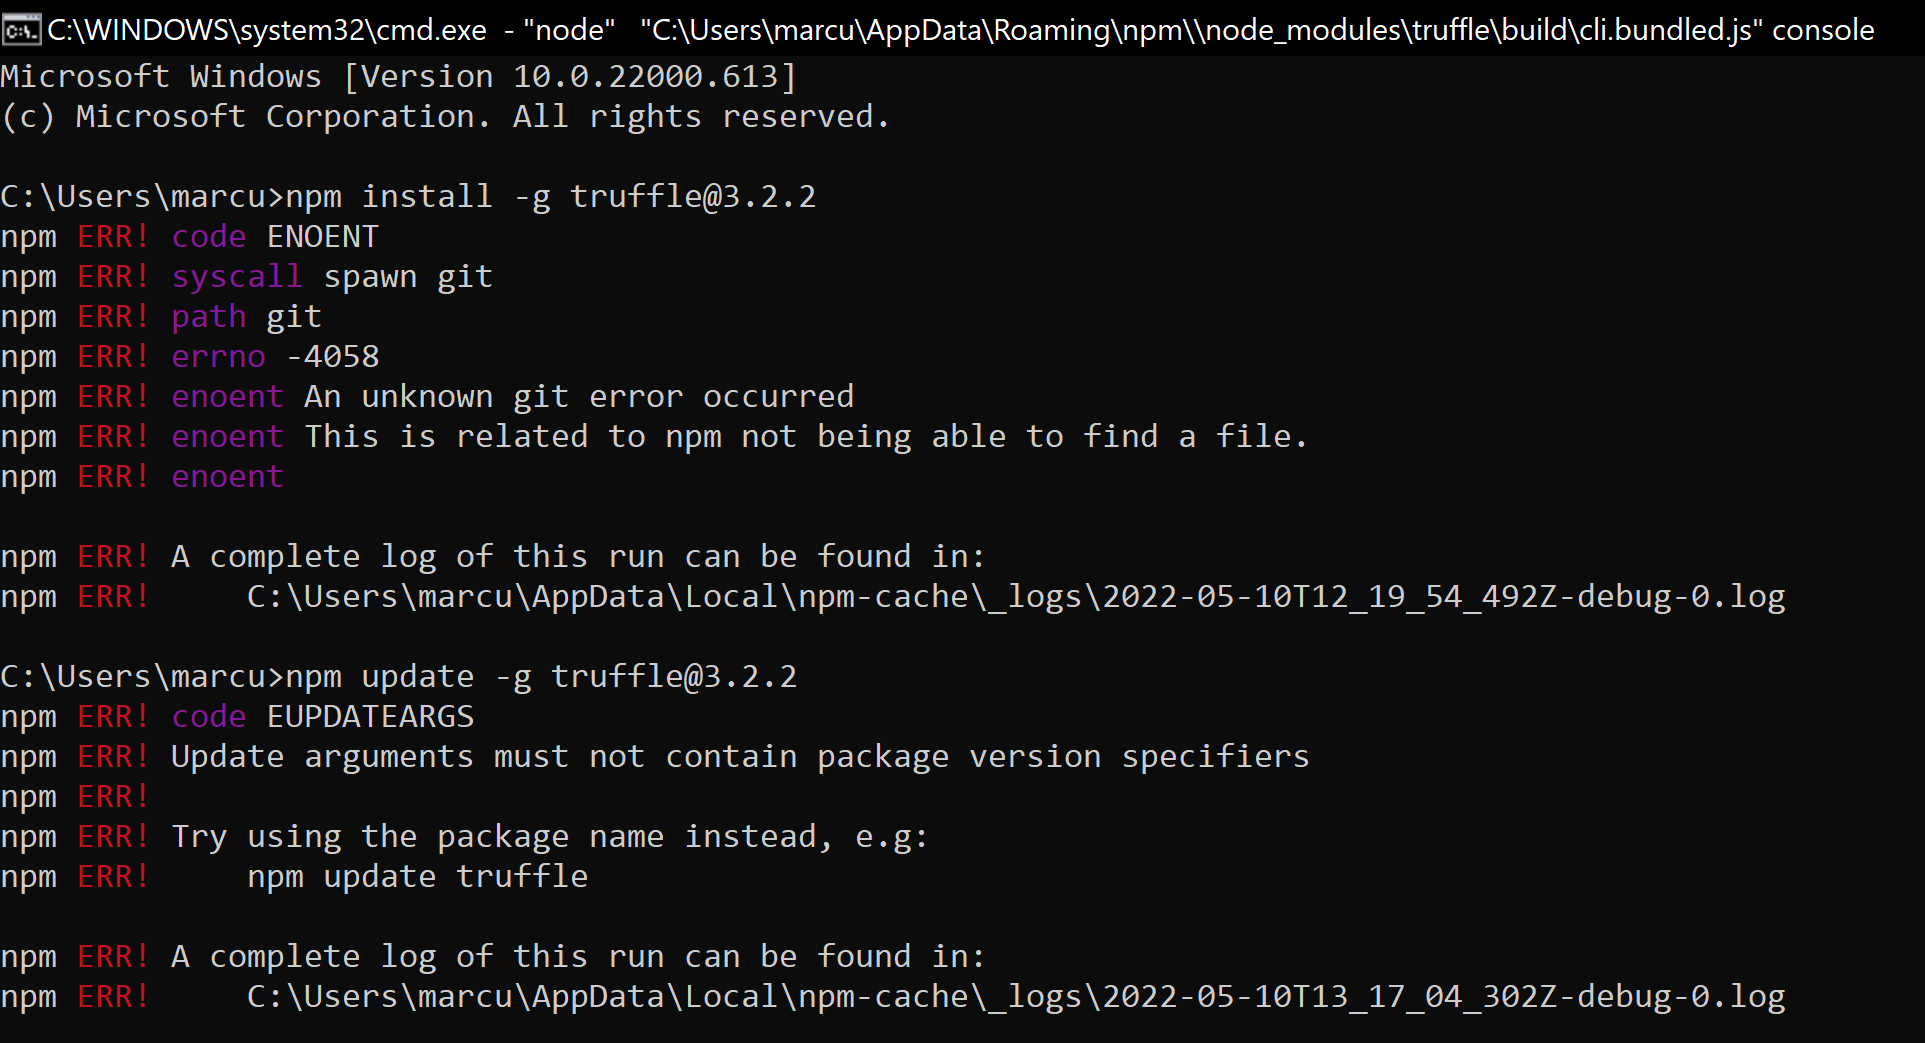
After a week I discovered it had a very simple solution. I needed to alter the truffle.config.js file, to specify the compiler version of solidity.
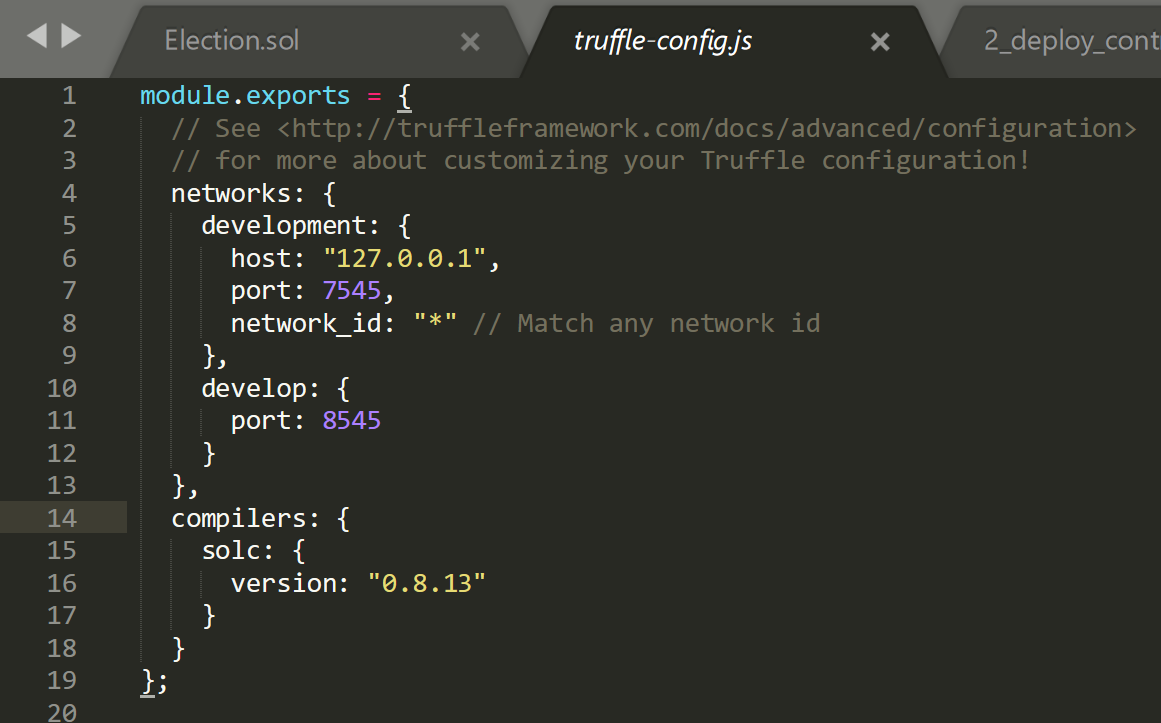
Now we move onto using mocha testing framework and the chai assertion library. Mocha is a testing library to node and required to conduct the further testing of the application. It is necessary for test executions, however we require a verification system in place, to verify data is correct. Therefore, we combine the use of Mocha with Chai, an assertion library.
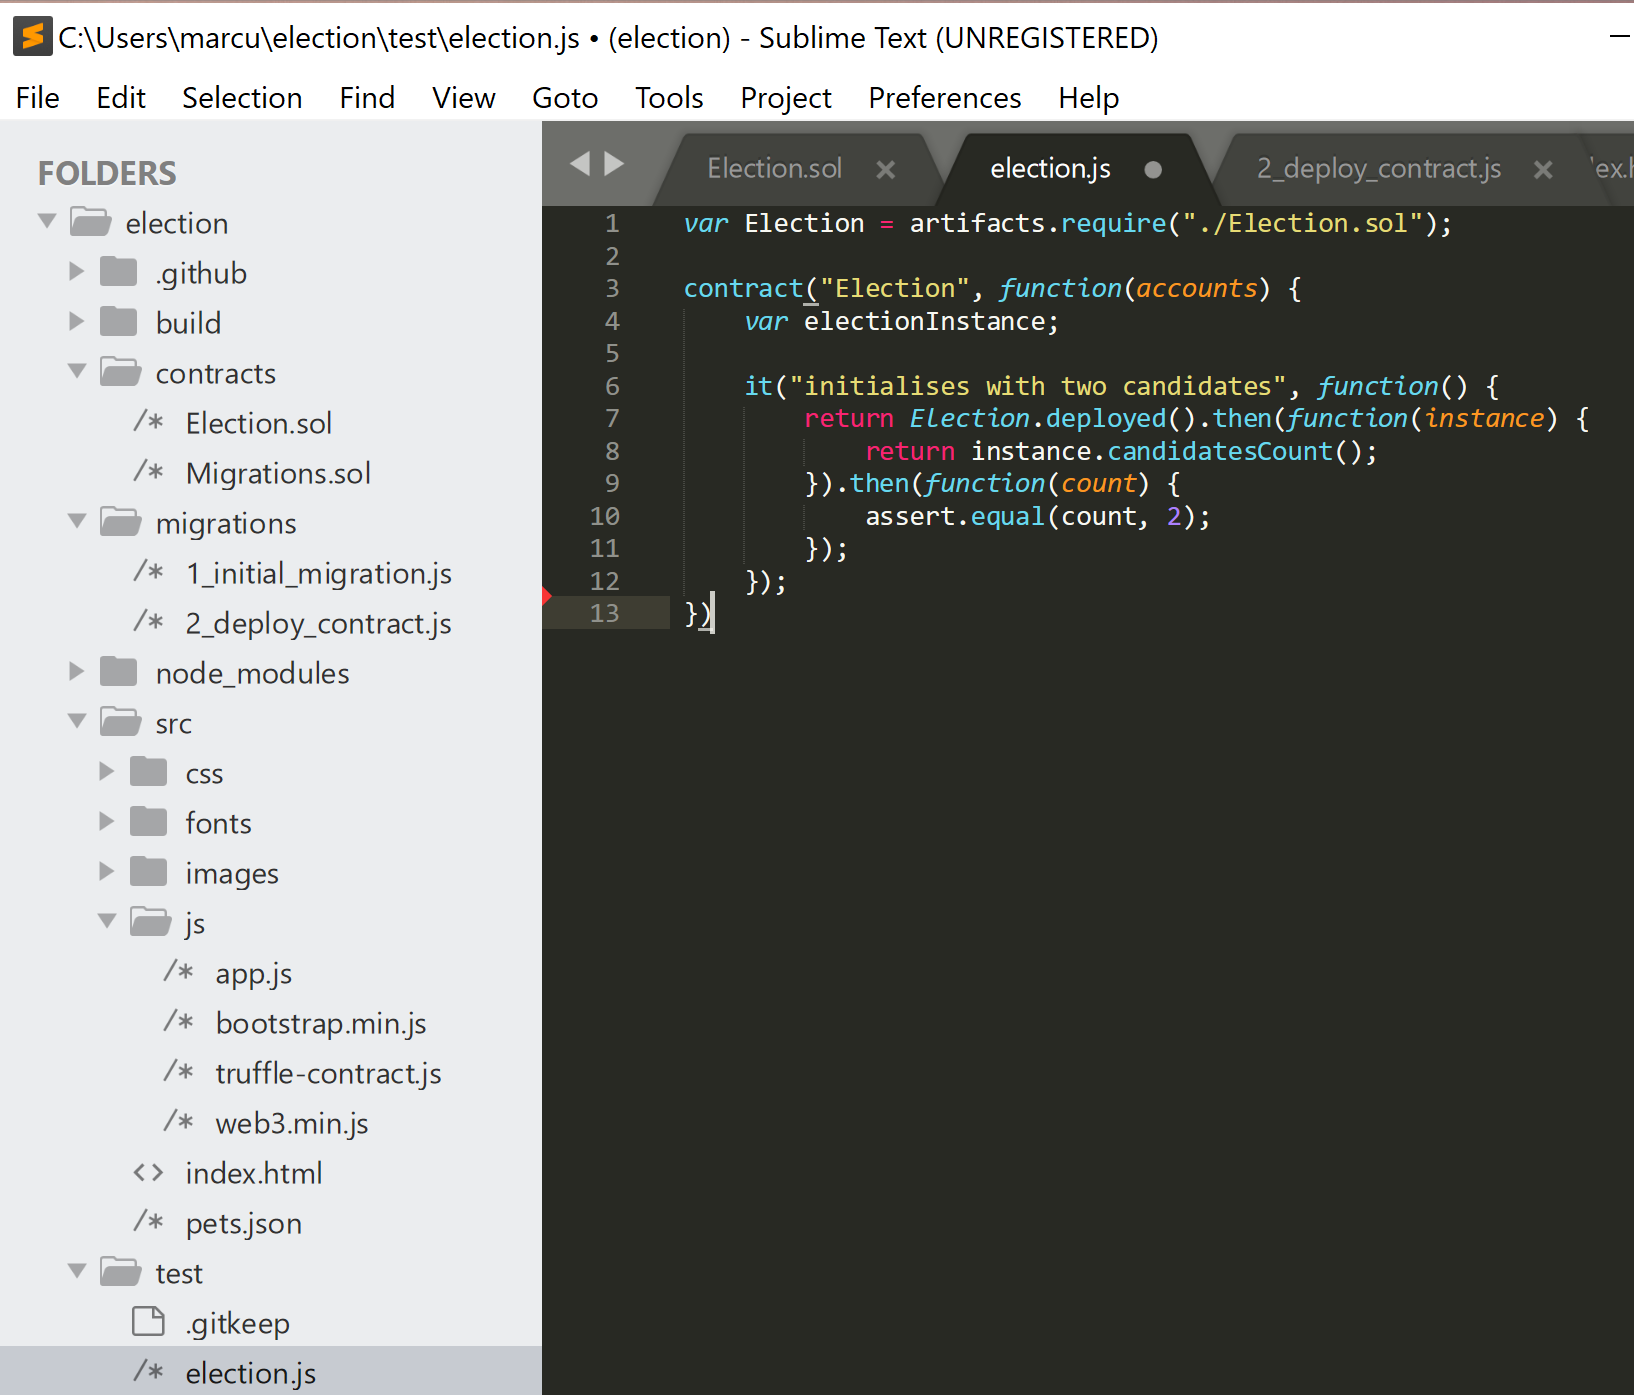
The code above demonstrates the implementation of mocha functions such as ‘it’. The use of ‘assert.equal’ is an example of the chai. This code tests the program to look for inaccuracies. Where it says assert.equal(count, 2);’ this is an example of using the chai assertion library to verify that there is only 2 candidates. See example below:
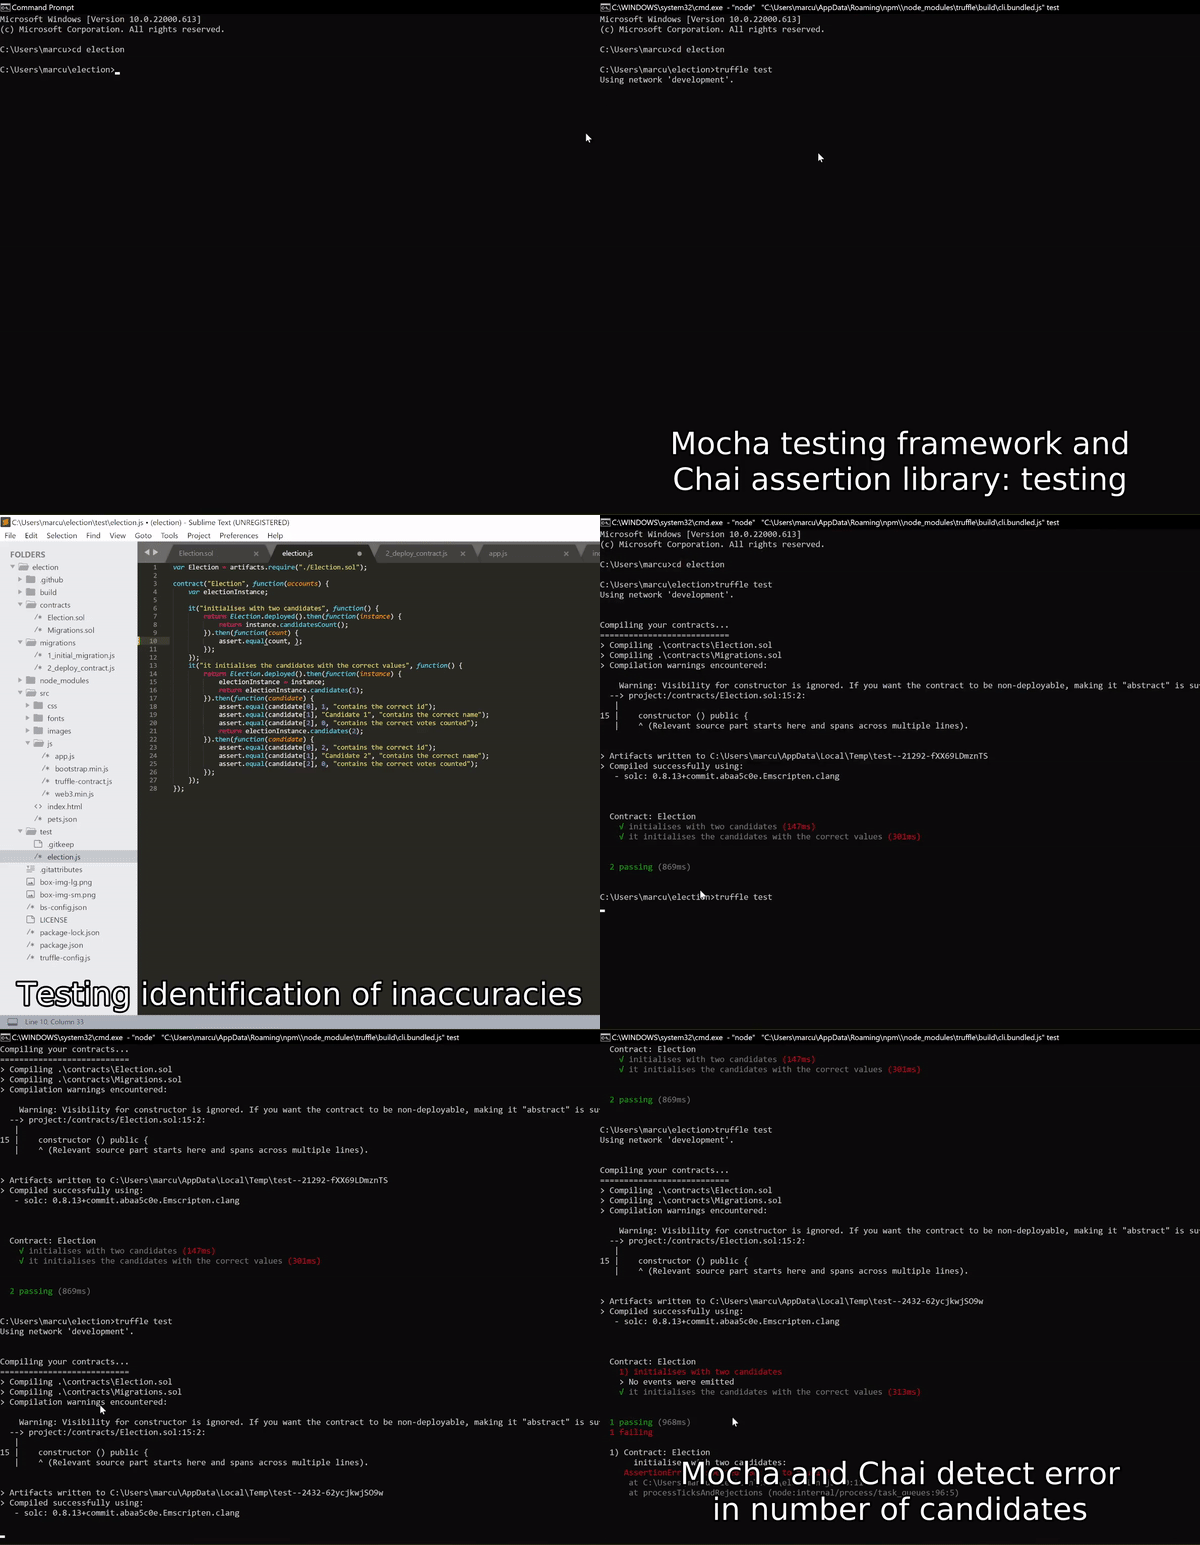
Here is a demonstration of code that enables mocha and chai to test the following:
- The correct ID of each candidate.
- The correct name.
- The correct number of votes for each participant.
In order for mocha and chai to access the data that enables them to conduct these tests, they must be linked to the Election smart contract as well as the voter accounts operating in ganache. This is done through:
contract("Election", function(accounts) {
var electionInstance;
The script is linked via line 1 to the Election.sol code, therefore containing the data from that file. The function(accounts) fetches the account data from ganache and the relevant data from the Election.sol file. Then it is all compiled into a variable ‘electionInstance’ to be used within the testing and initialisation code below it, thus enabling verification of candidate information.

it("it initialises the candidates with the correct values", function() {
return Election.deployed().then(function(instance) {
electionInstance = instance;
return electionInstance.candidates(1);
}).then(function(candidate) {
assert.equal(candidate[0], 1, "contains the correct id");
assert.equal(candidate[1], "Candidate 1", "contains the correct name");
assert.equal(candidate[2], 0, "contains the correct votes counted");
return electionInstance.candidates(2);
}).then(function(candidate) {
assert.equal(candidate[0], 2, "contains the correct id");
assert.equal(candidate[1], "Candidate 2", "contains the correct name");
assert.equal(candidate[2], 0, "contains the correct votes counted");
});
This code demonstrates the use of JavaScript promise chaining, necessary as the testing consists of several asynchronous operations. The candidates have their information validated one after the other in an asynchronous operation. In order for continuation of code operation after the first candidate’s information has been validated, the code performs a callback function through ‘electionInstance.candidates(1);’ and so on.
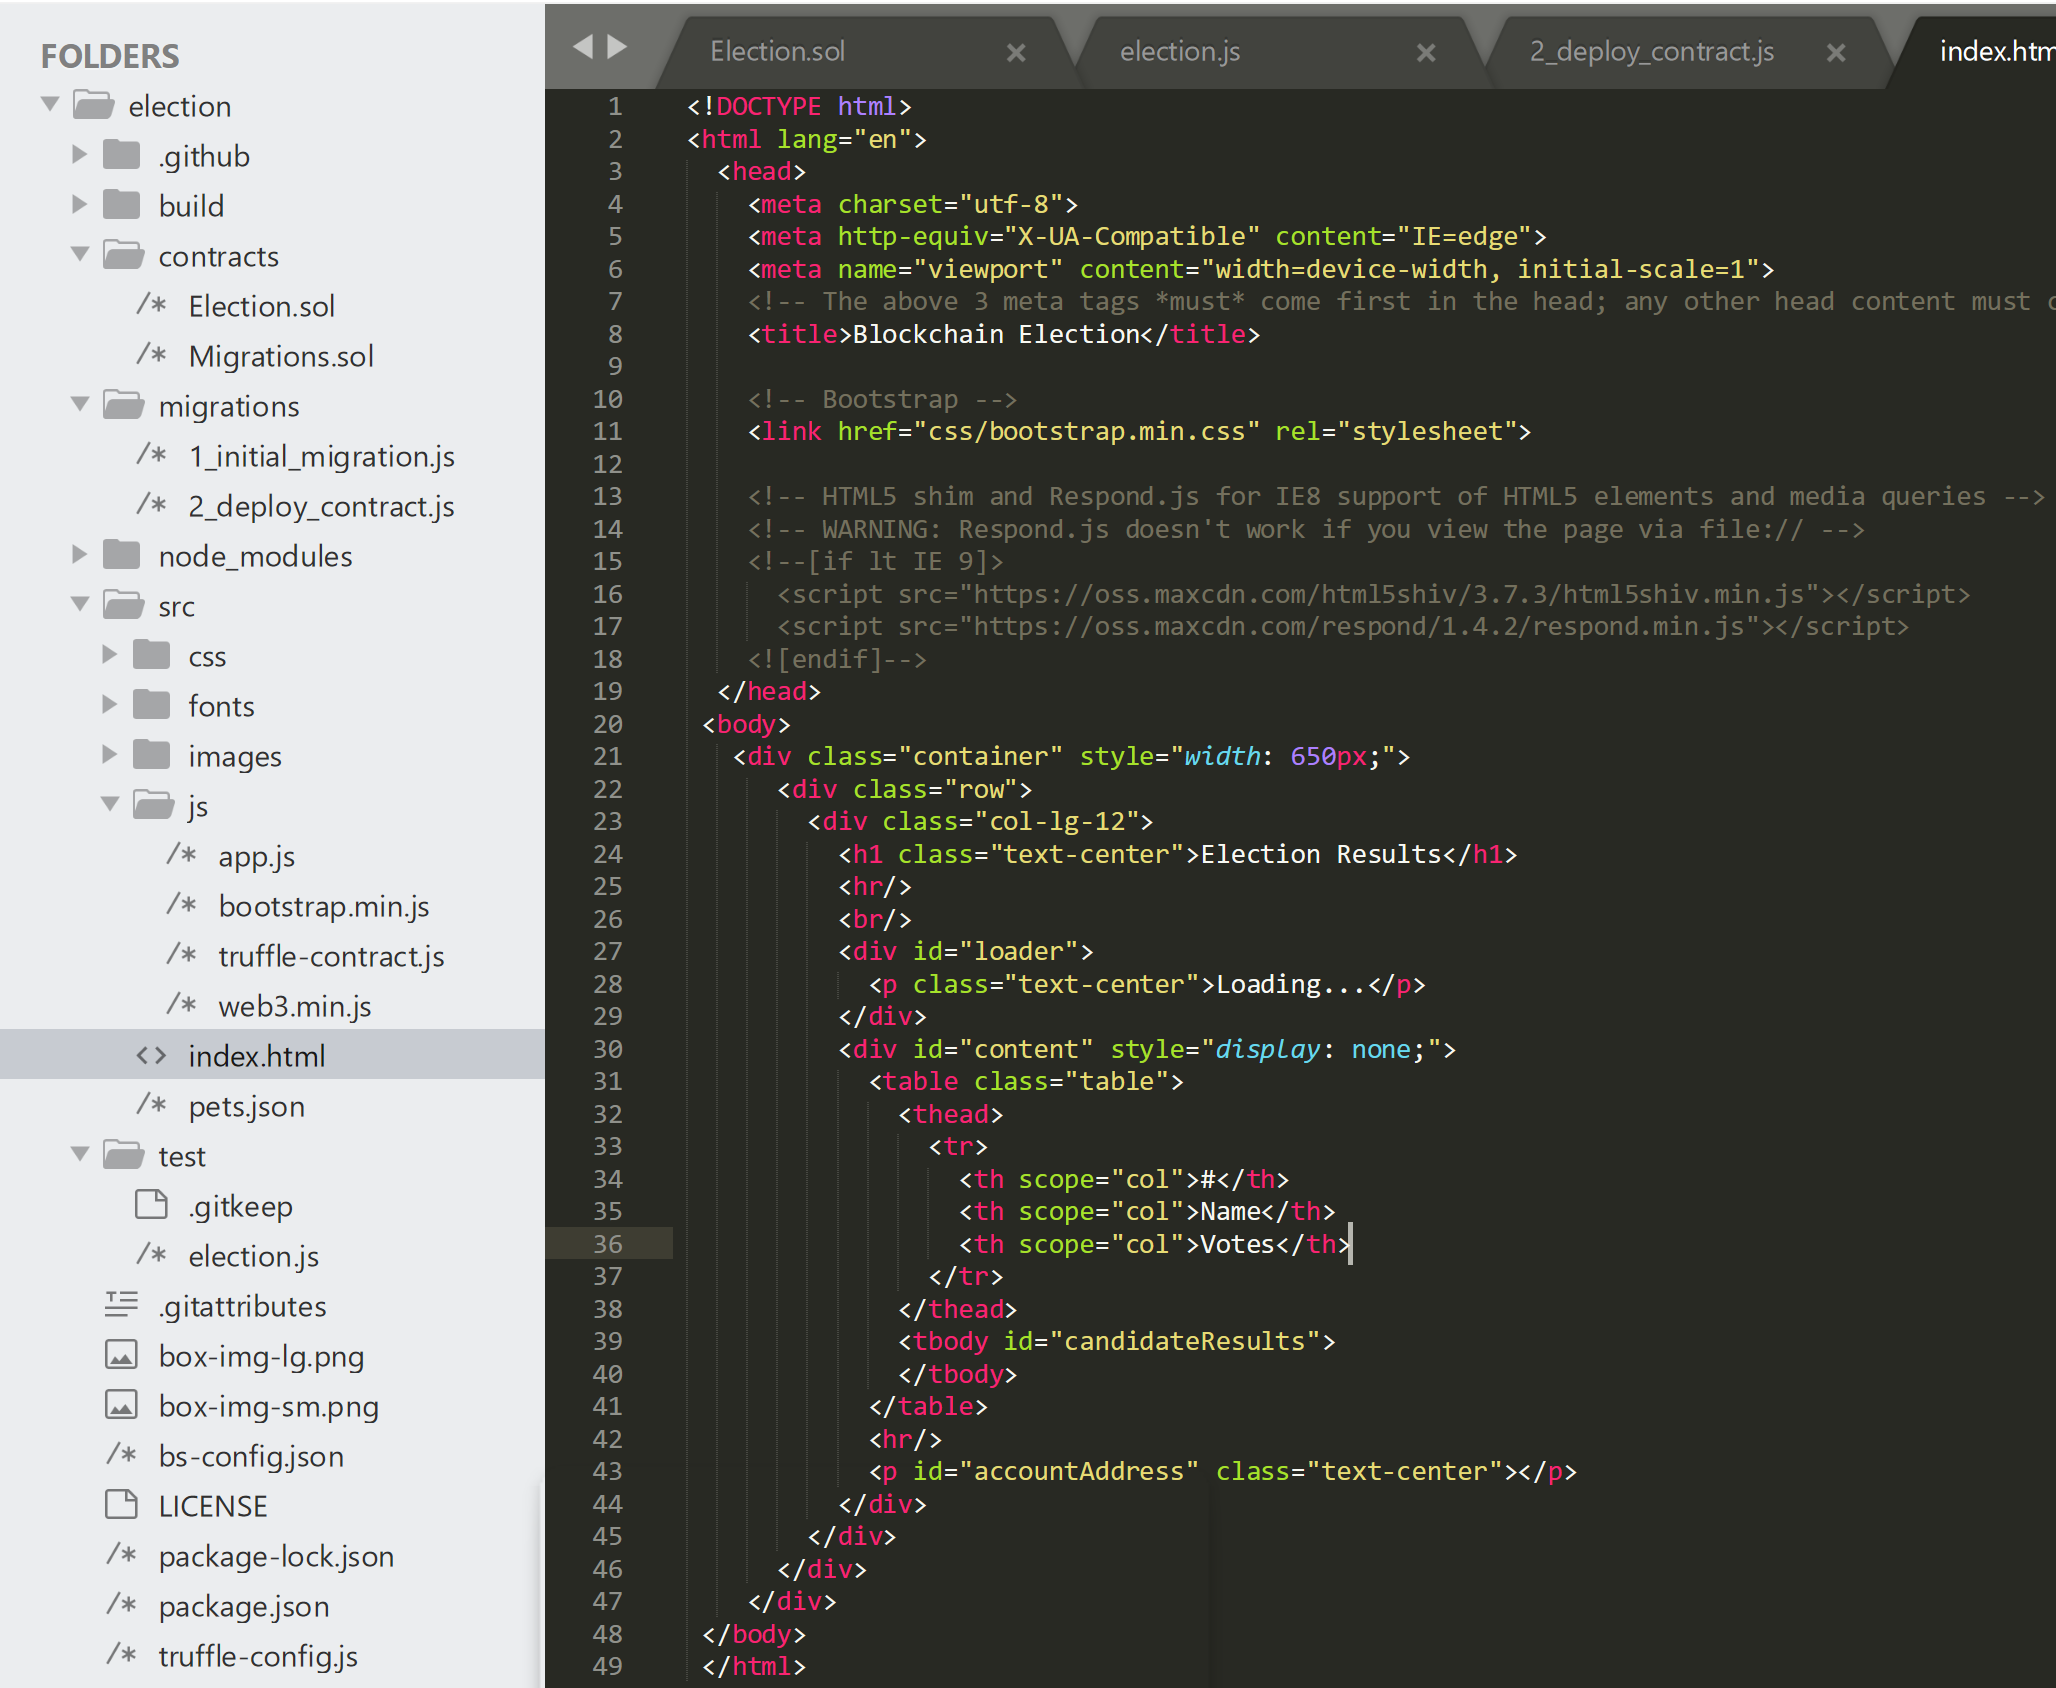
This is the site after the html code, a basic skeleton. The application requires a loading feature as it is an asynchronous application, functions operate one after the other rather than all at the same time, therefore it may take longer to configure than synchronous alternatives. The reason we use asynchronous code is to enable external operations outside of the main thread of code. There are many moving parts, from ganache, node.js, truffle, to metamask, therefore it is a necessity.
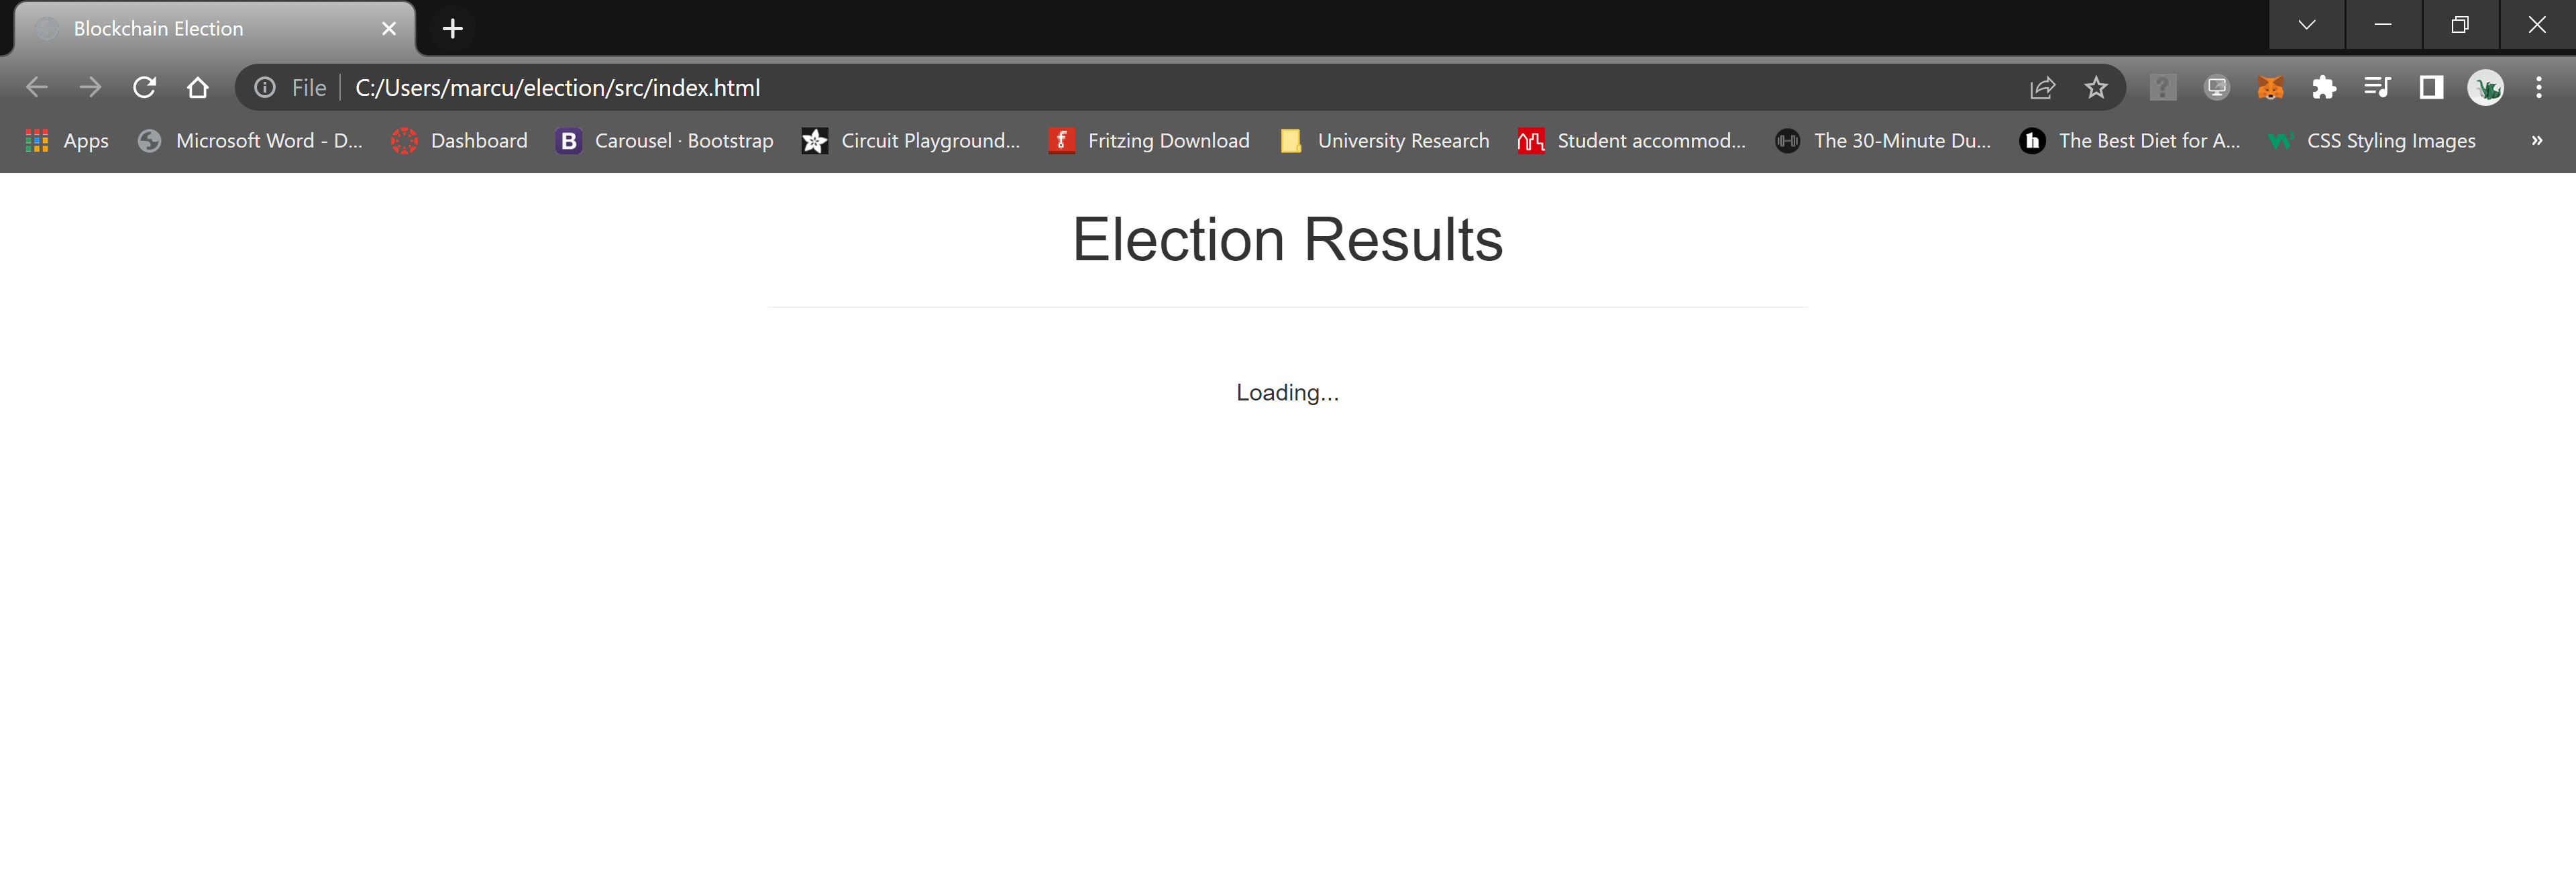
Unfortunately, this is the point of the frontend that cannot currently be initialised. It is due to the metamask chrome ad on not communicating with the JavaScript which is currently undergoing maintenance, I am providing the informal development document should the user wish to see it. However the skills acquired through this code have enabled me to create an alternative, more reserved project although completing the aims specified at the beginning.
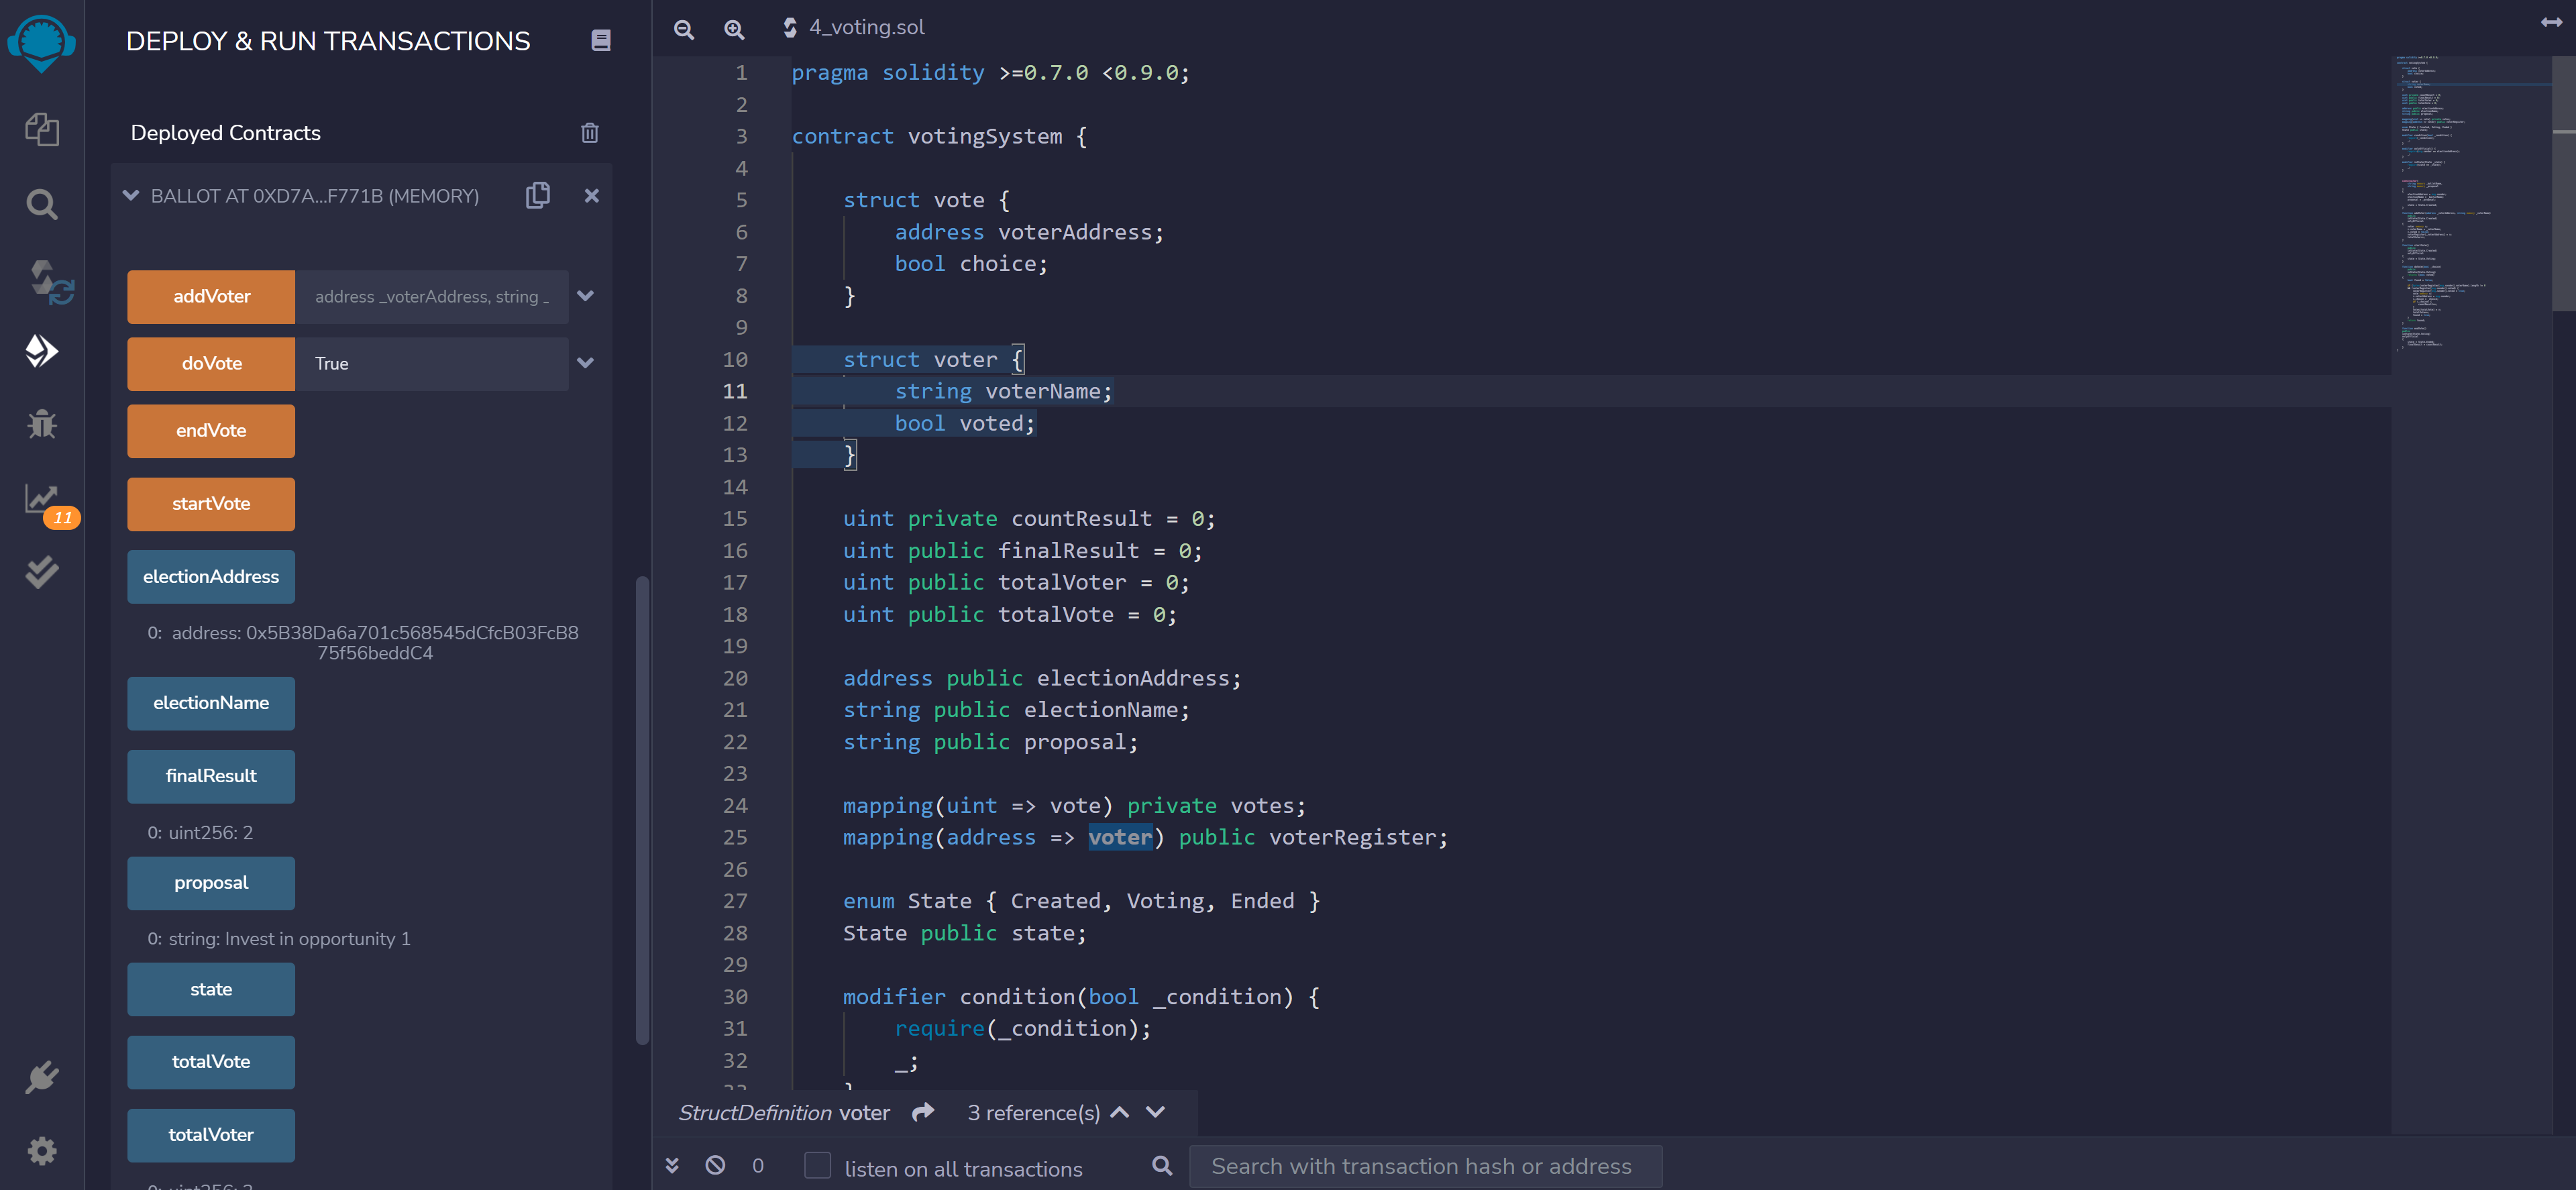
I began by specifying the solidity version. I then created the votingSystem contract. I then categorised the voterAddress within that variable through the use of the struct function. If the voterAddress corresponds with the command to vote, the code initialises the choice variable which is governed by the bool data type. What this does is the individual can vote true or false (meaning yes or no) to a vote being held.
We count the votes through countResult. This variable is private because we only want to see the votes at the end, not whilst the vote is ongoing, as this may influence individuals to vote in the way everyone else is. When the vote is finished, the finalResult is shared the data from the private countResult and then displays it publicly.
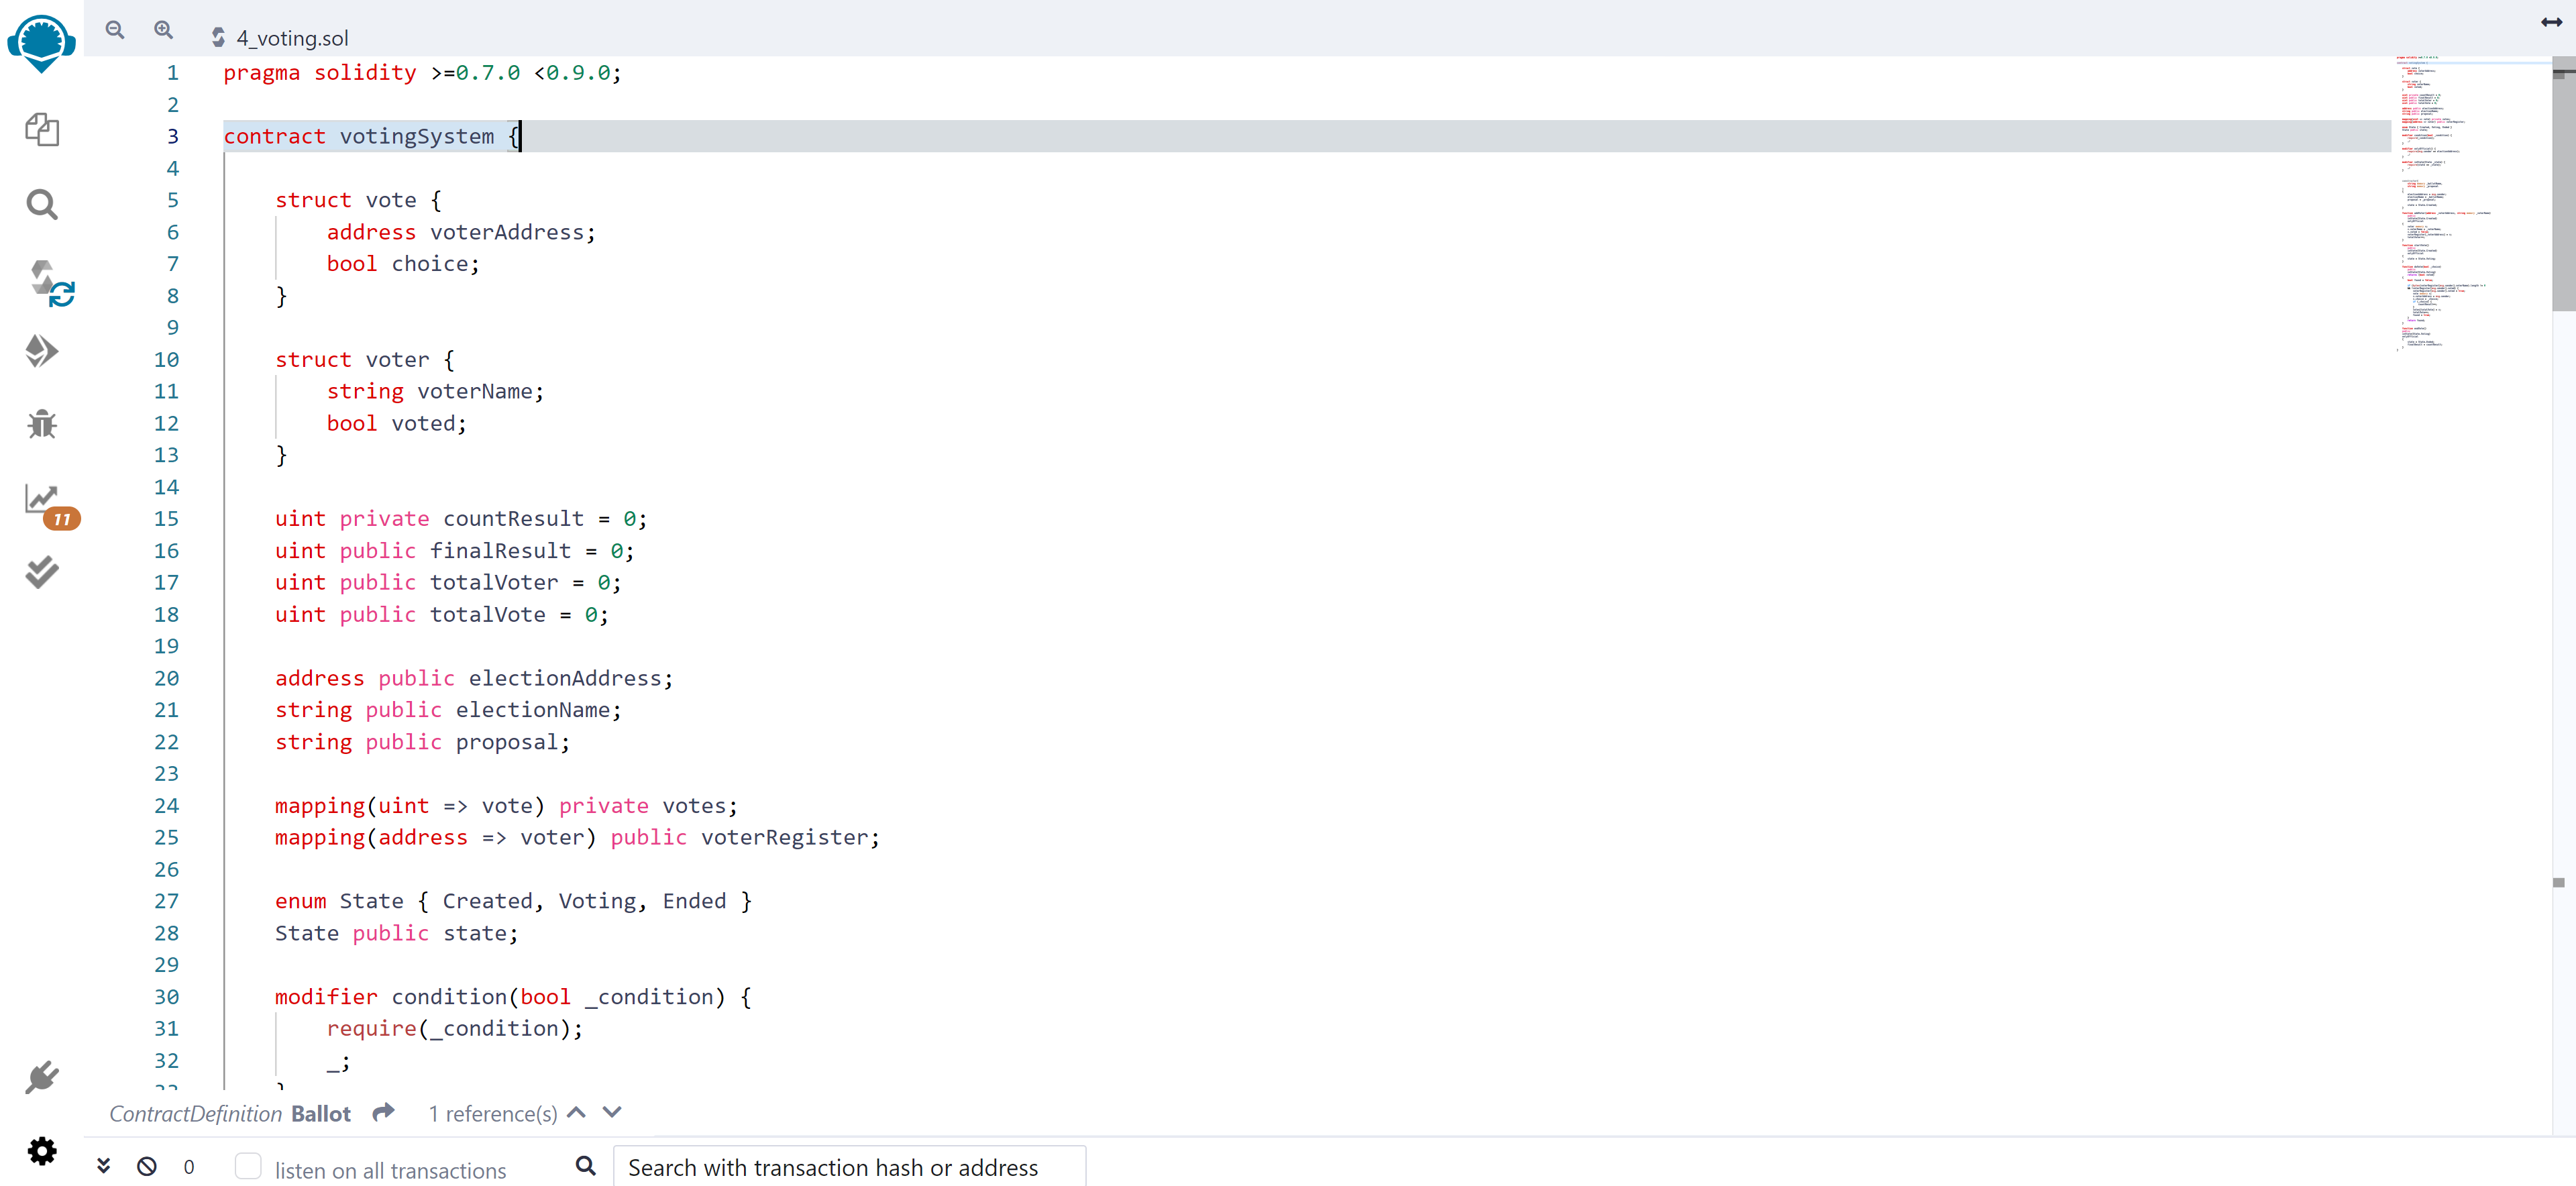
electionAddress acts as the host of the ballot and can create elections. We then create the register option, with simple conditional code, it specifies only people who have registered their blockchain address can vote. The enum is used to track exactly where we are in the election, which stage. There are three stages, stage of creation, the stage of voting, and the end of the voting process. The modifier makes sure the participants have to answer in true or false, to give a definitive vote. We can then include the constructor function, followed by a number of corresponding variables. The state must be State.Created or else the code wont function. The addVoter function ensures only the ballot creator, in this case they are referenced as ‘onlyOfficial’, can add participants, as you can’t have a vote open to anyone who would like to join. ‘onlyOfficial’ is placed at functions where only the creator of the ballot can start, end, and add participants.
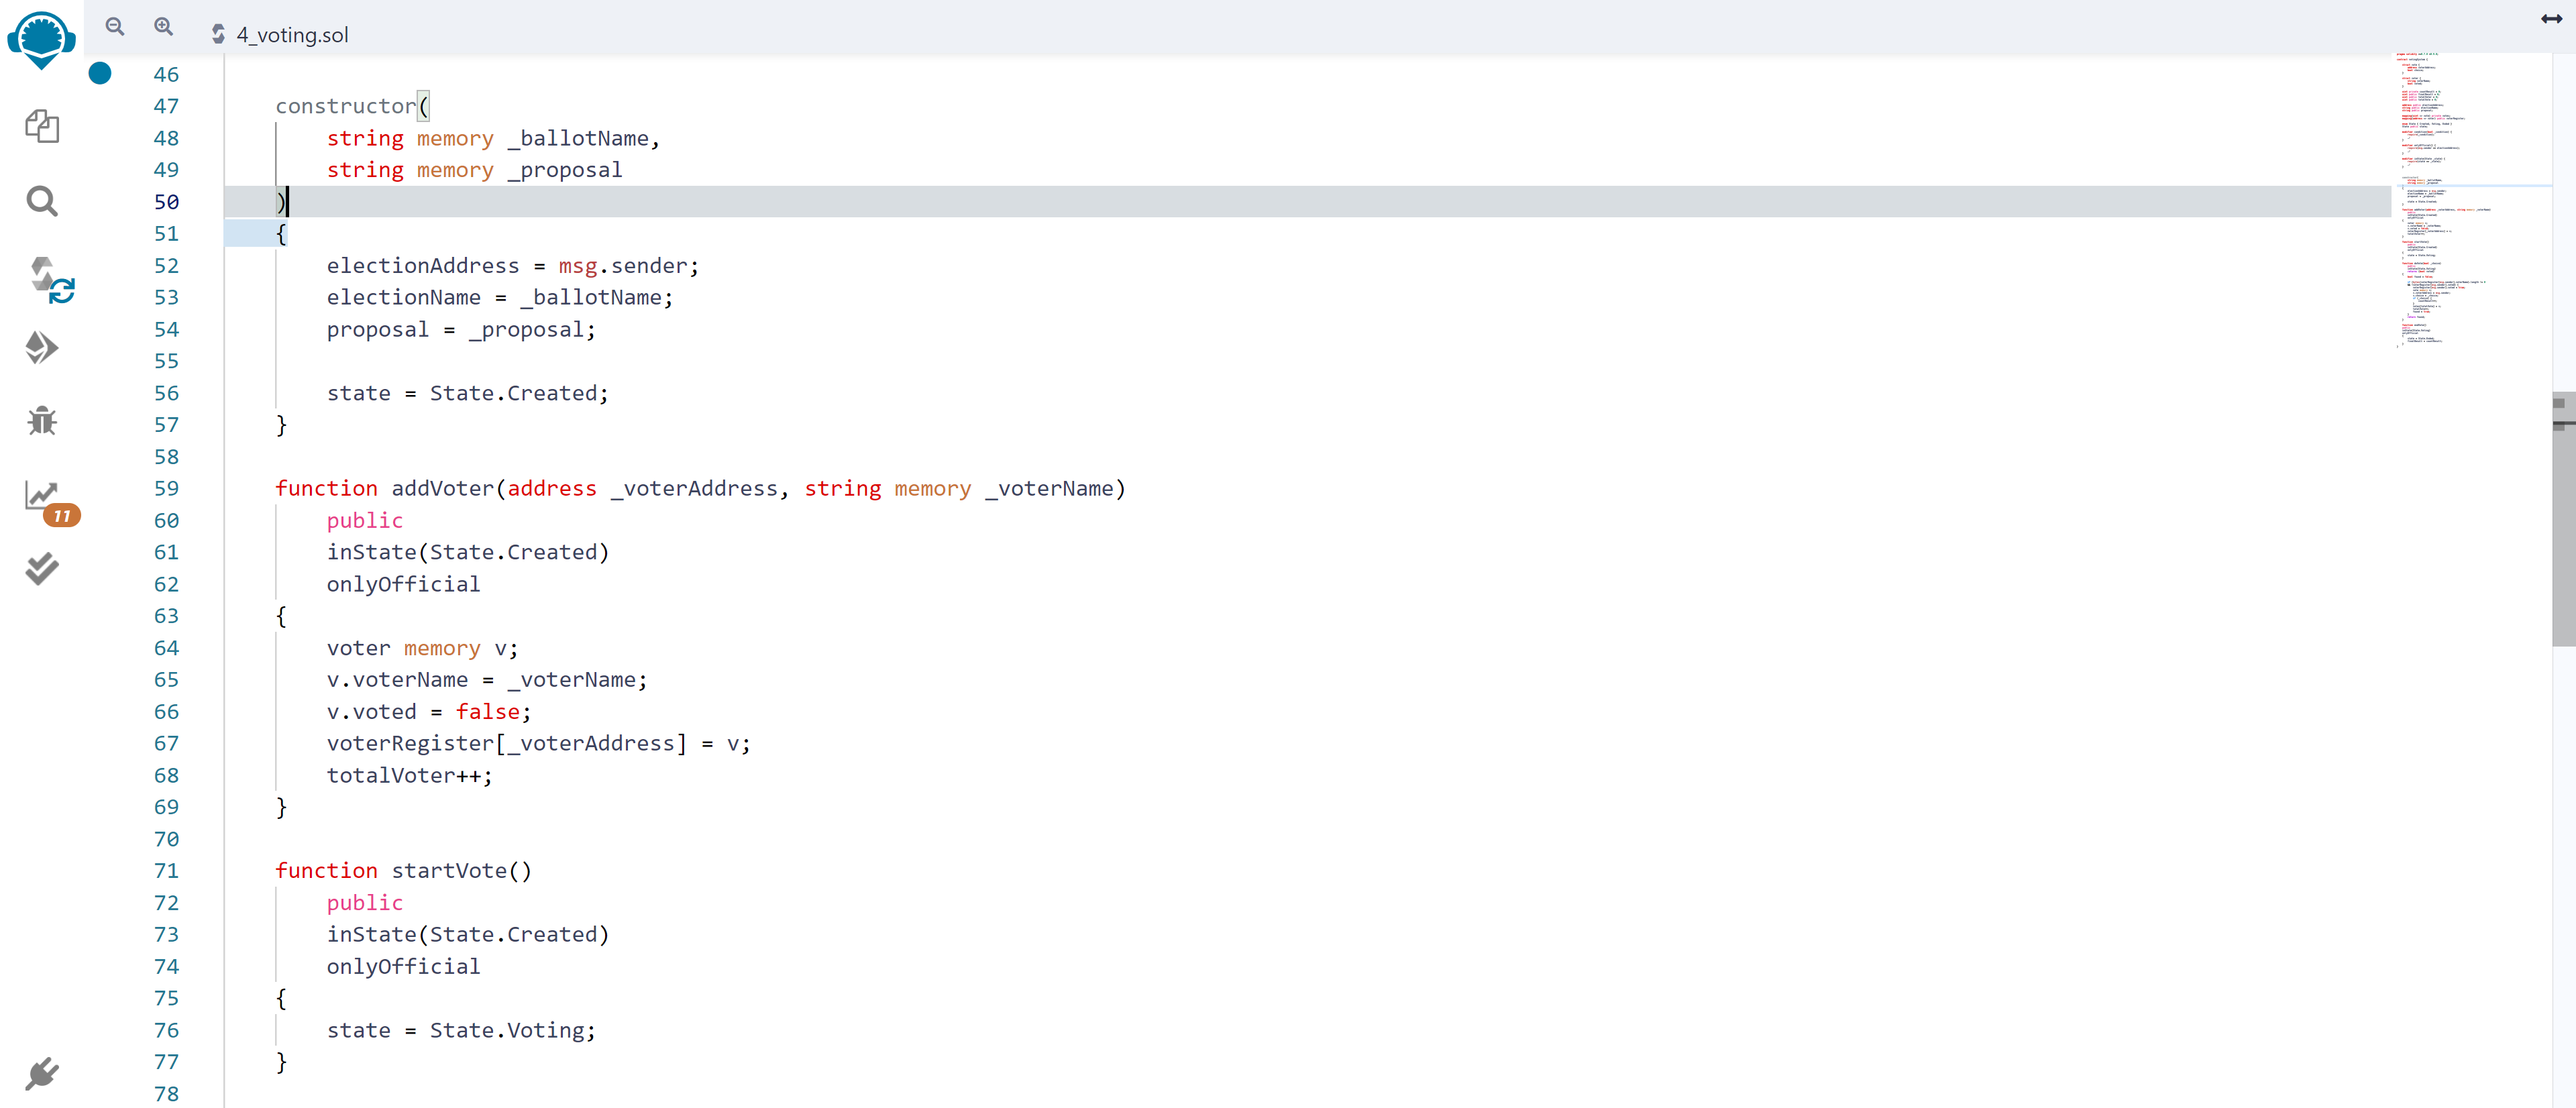
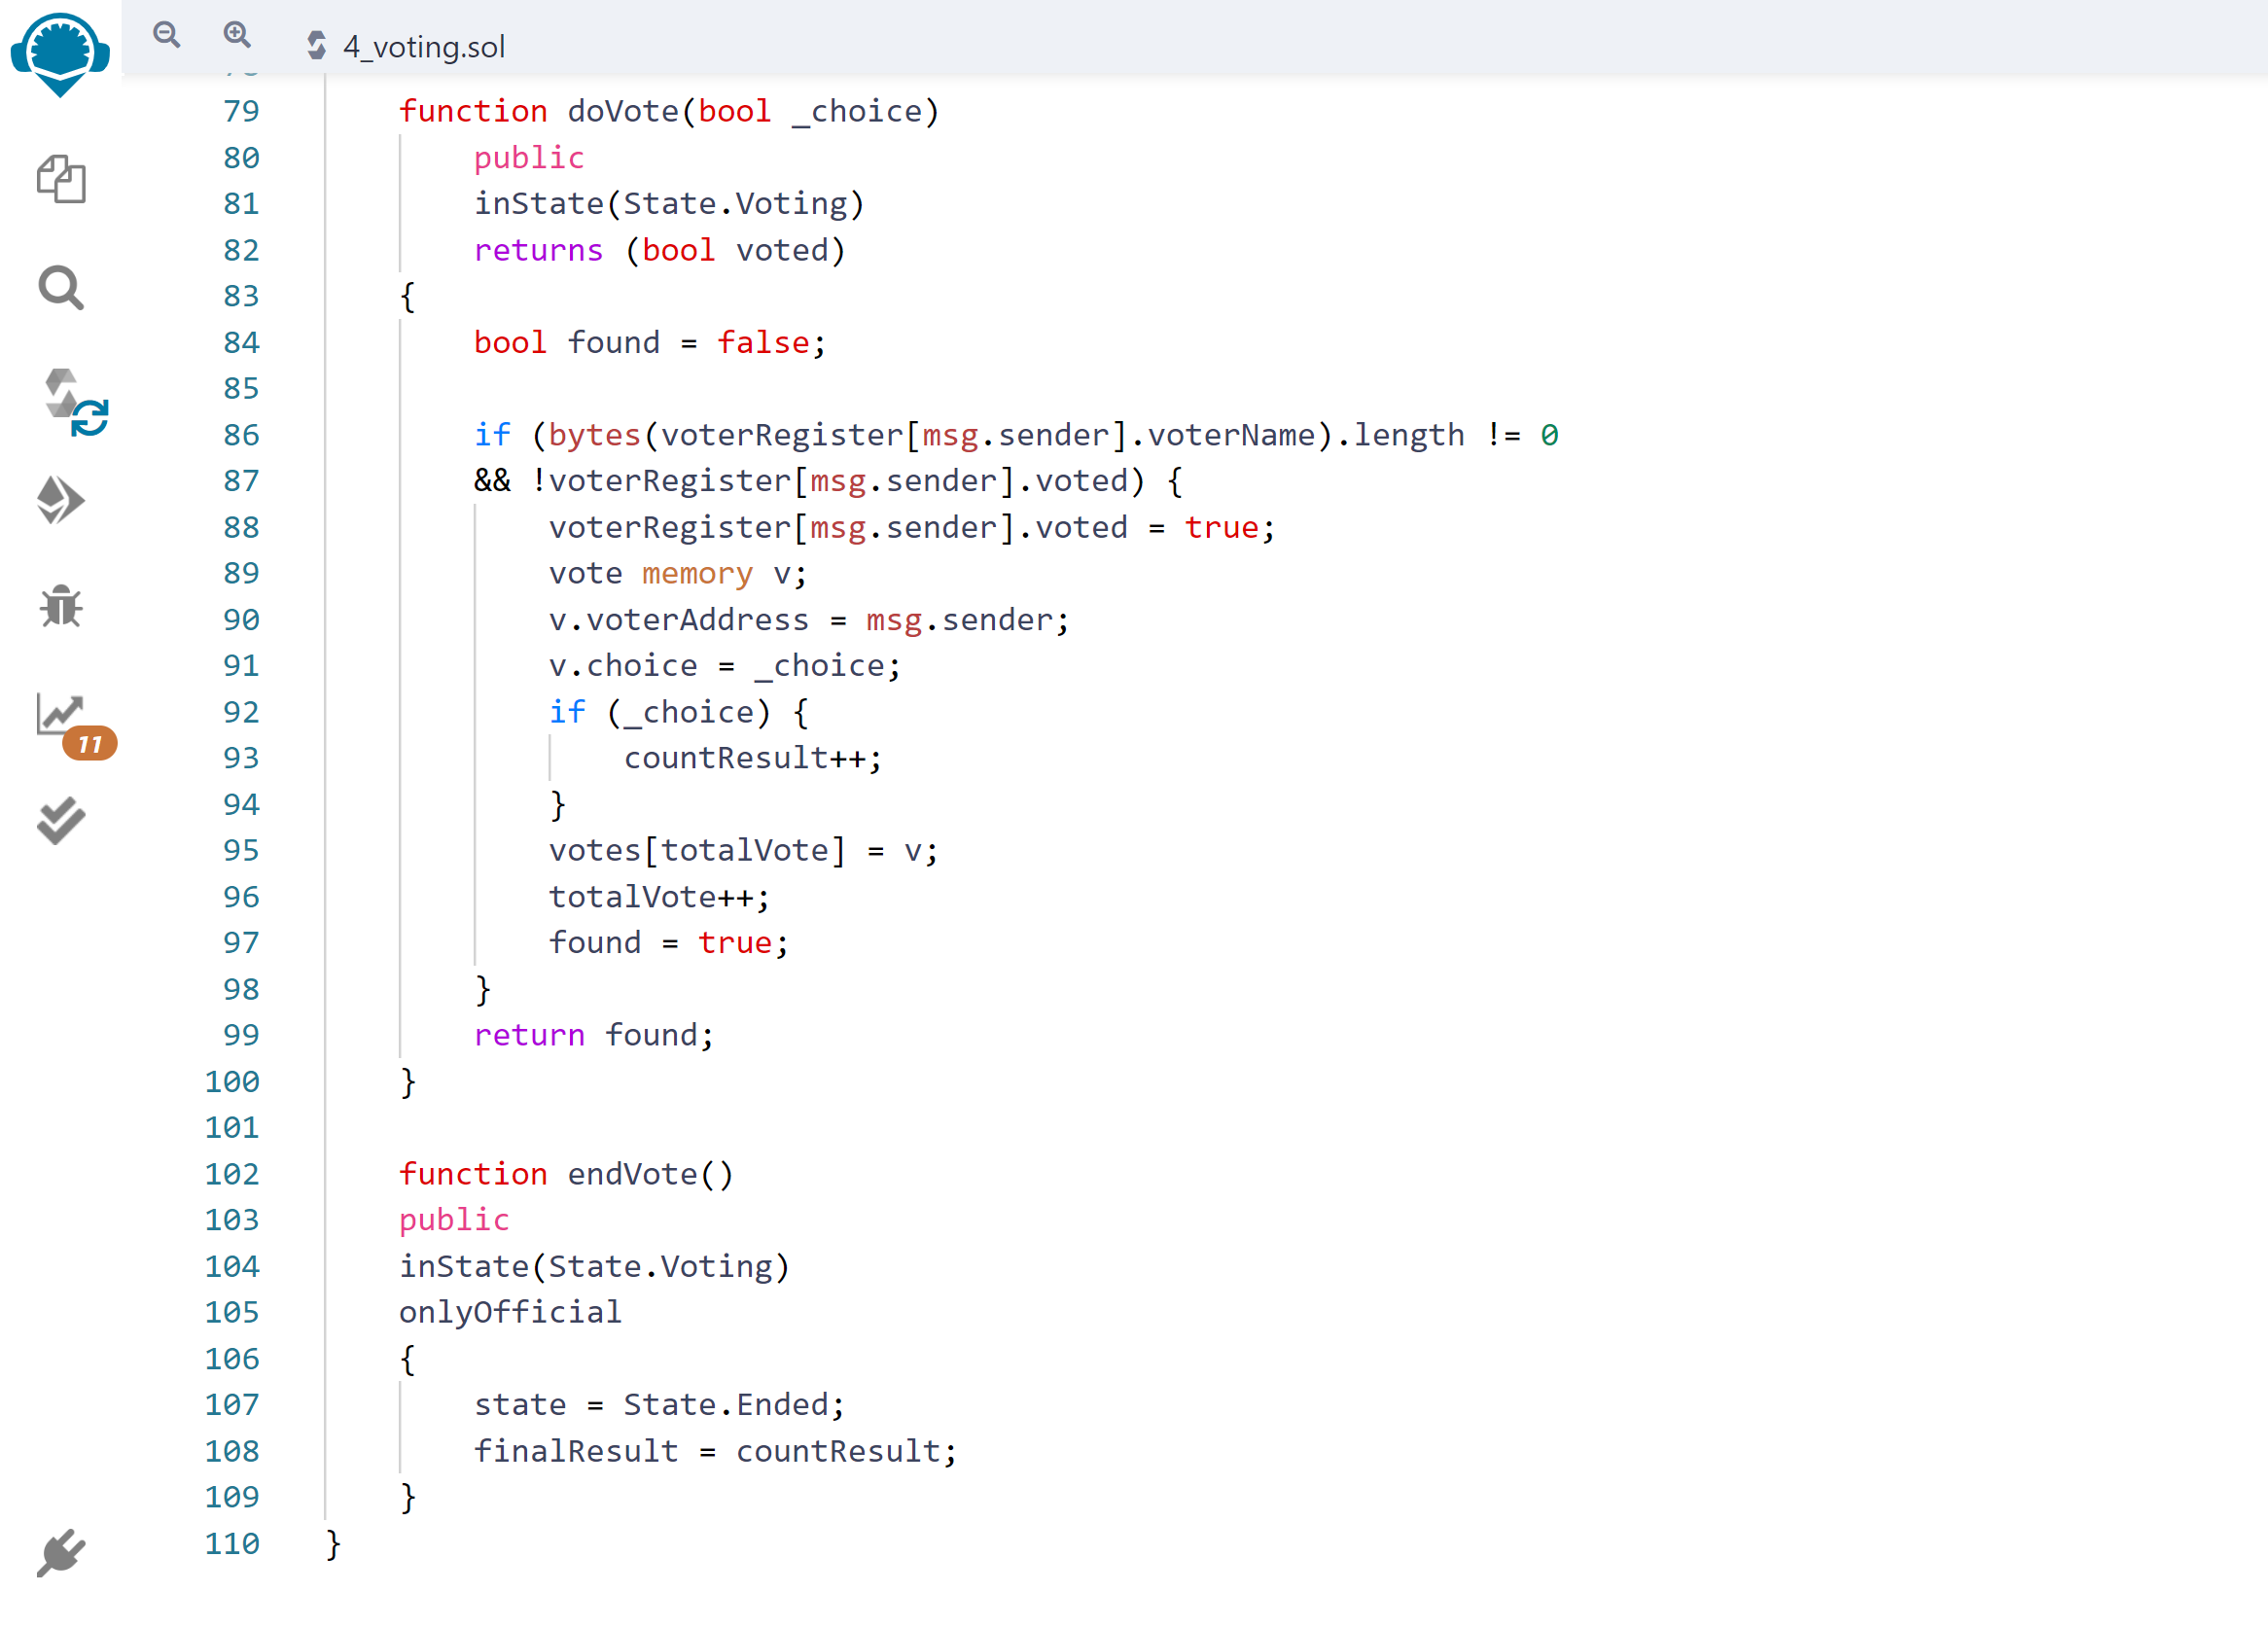
The choice variable means if the user has voted true, then the countResult is incremented. At the end, we can only end the vote if the state is in the Ended state, therefore I inputted the state = State.Ended; to signify the end of the vote. The additional reason is to prevent anyone else calling the vote function again thus overwriting and invalidating the vote already conducted.
